UI 自动化测试
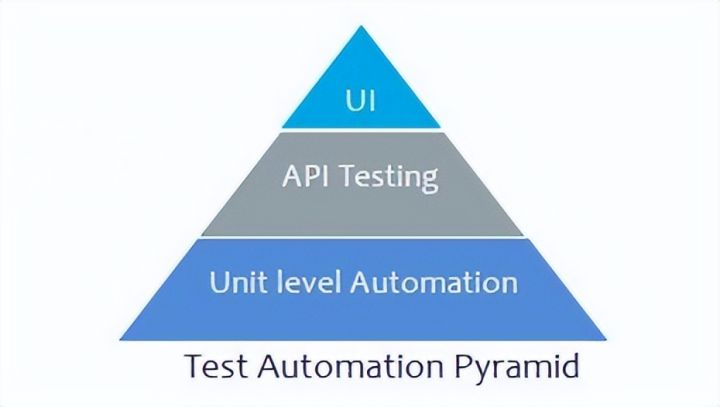
我们可以看到自动化测试金字塔的顶端是 UI 自动化测试,为啥呢,我想是以下几点原因:
- UI 界面重复性较强
- UI 工作量比较大
- UI 界面离用户最近
- 分层中包含 UI 自动化测试
UI 自动化测试案例
接下来我使用以下几个数据,来做一个 UI 自动化测试的小案例:
- Python
- Selenium
- Unittest
- Ddt
- HTMLReport
整体结构
Business 模块
这是一个公共的封装模块,封装登录模块:
from Page_Object.Common_Page.login_page import Login_Page
from HTMLReport import logger
import time


def login(driver, username, password):
    """
    param driver
    param username
    param password
    return:None
    """
    logger().info(f"{username},{password}")
    login_page = Login_Page(driver)
    login_page.send_username(username)
    login_page.send_password(password)
    login_page.submit()
    time.sleep(2)
Login Case 模块
涉及到的模块有:
- Common:基于 Selenium 的封装的模块
- PageObject:页面元素的模块
- Report:报告的模块
- TestCase:测试用例模块
- TestData:测试数据模块
- TestSuit:测试套件模块
import unittest
from Business.Base_url import url_index
import ddt
from Common.tools.read_txt import read_txt
from HTMLReport import logger
from Page_Object.Common_Page.index_page import Index_Page
from Common.selenium_library import SeleniumBase
from Business.login_business import login


@ddt.ddt
class Test_login(unittest.TestCase):

    def setUp(self):
        self.driver = SeleniumBase().get_web_driver()

    def tearDown(self):

        SeleniumBase(self.driver).quit()

    @ddt.unpack
    @ddt.data(*read_txt('TestData/login_user_password.txt'))
    def test_login(self, username, password, assert_type):
        se = SeleniumBase(self.driver)
        se.get(url_index)
        login(self.driver, username, password)
        se.add_page_screen_shot()

        if assert_type == '1':
            logger().info("login success")
            text = Index_Page(self.driver).login_success()

            self.assertIn("", text, 'assertion success')

        elif assert_type == "2":
            text = self.driver.find_element_by_id("submit").text
            self.assertIn("login", text, 'assertion fail')

        elif assert_type == "3":
            text = self.driver.find_element_by_id("submit").text
            self.assertIn("", text, 'assertion fail')

        elif assert_type == "4":
            text = self.driver.find_element_by_id("submit").text
            self.assertIn("login", text, 'assertion fail')

        else:
            logger().info(f"unknown assertion type {assert_type}")
            self.assertTrue(False, "unknown assertion type")
Login Suit 模块
import unittest

from TestCase.LoginCase import login_case


def return_suite():
    suite=unittest.TestSuite()

    loader=unittest.TestLoader()

    suite.addTests(loader.loadTestsFromTestCase(login_case.Test_login))

    return suite
浏览器配置
[local]
local_browser = False
wait_time = 10

[browser]
name = chrome
;name = firefox
;name = ie
window_width =
window_height =

[grid]
command_executor = http://127.0.0.1:4444/wd/hub
headless = False
proxy =
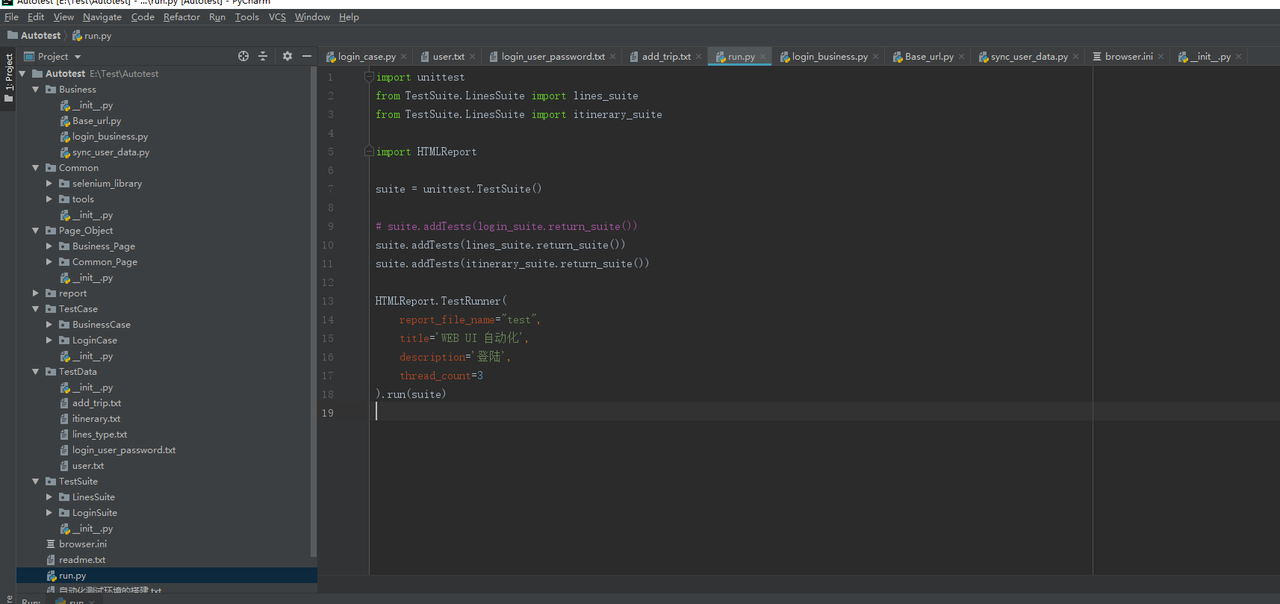
Run 模块
运行整体的文件
import unittest
from TestSuite.LinesSuite import lines_suite
from TestSuite.LinesSuite import itinerary_suite

import HTMLReport

suite = unittest.TestSuite()

# suite.addTests(login_suite.return_suite())
suite.addTests(lines_suite.return_suite())
suite.addTests(itinerary_suite.return_suite())

HTMLReport.TestRunner(
    report_file_name="test",
    title='WEB UI auto',
    description='logon',
    thread_count=3
).run(suite)
UI 测试完衔接 API 测试
UI 测试完,需要顺便测试 API ,这样才算是整个前端的测试完成,今天推荐 Apifox 来进行 API 的测试。
使用 Apifox 进行 API 自动化测试
今天就拿 Apifox 来举例子,Apifox 是一个非常好用的 API 工具,他集测试、文档、Mock、协同于一身,且支持中文、使用免费,功能非常强大!
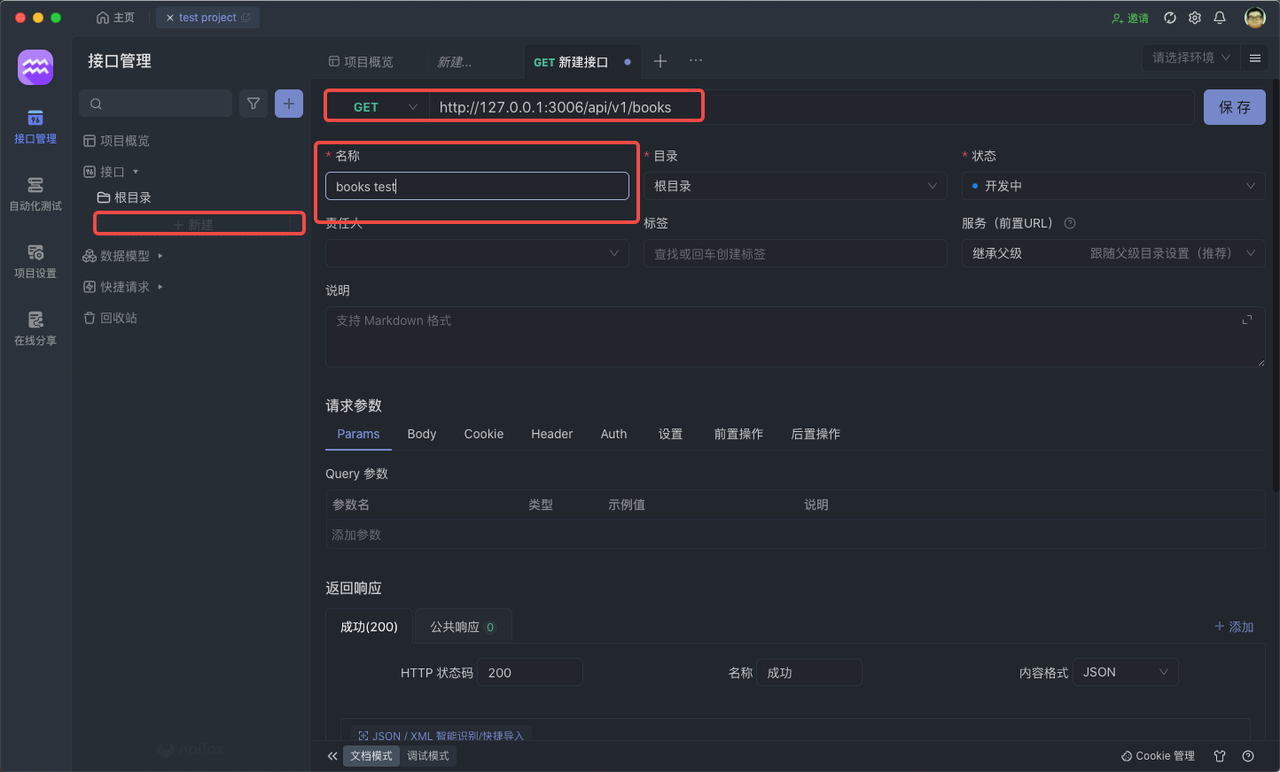
创建接口
首先我们需要创建一个接口。
设置断言
Apifox 支持可视化断言,非常方便,你甚至不需要写脚本代码~
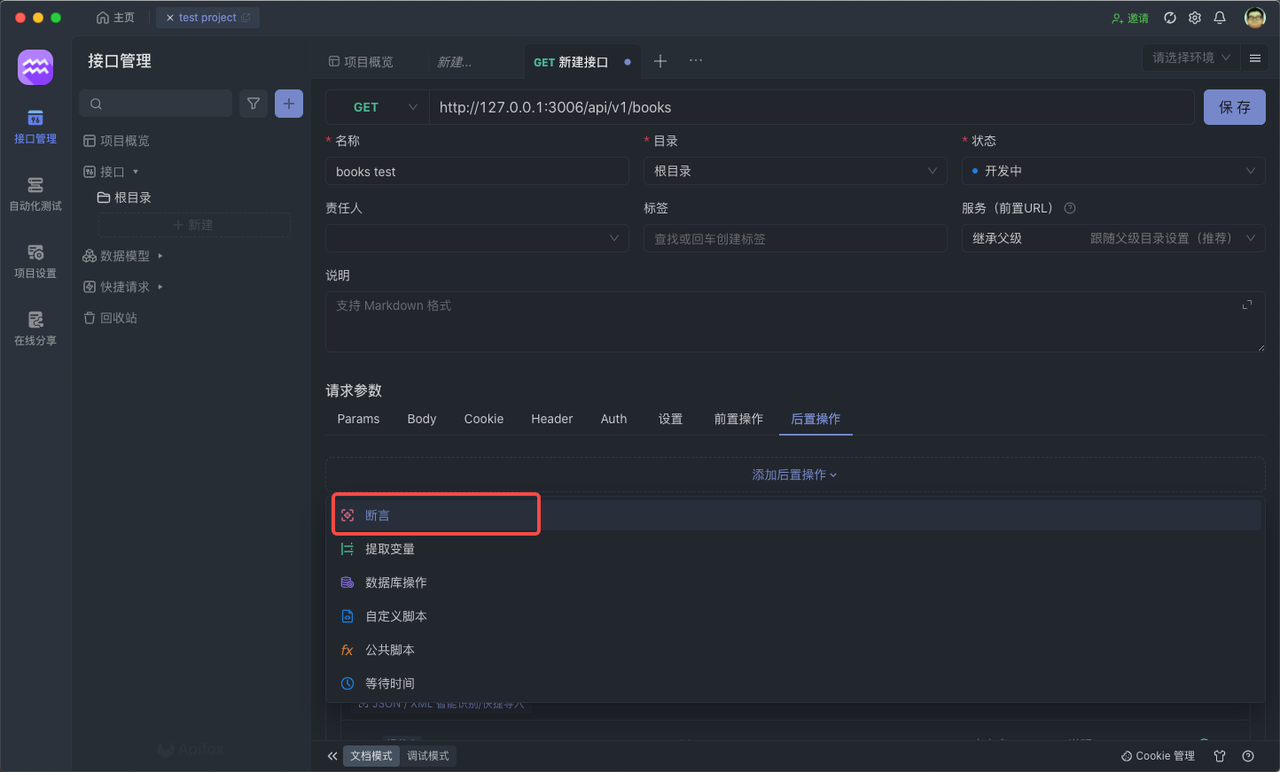
直接在 Apifox 提供的表单里填写对应的信息即可,不需要写脚本代码。
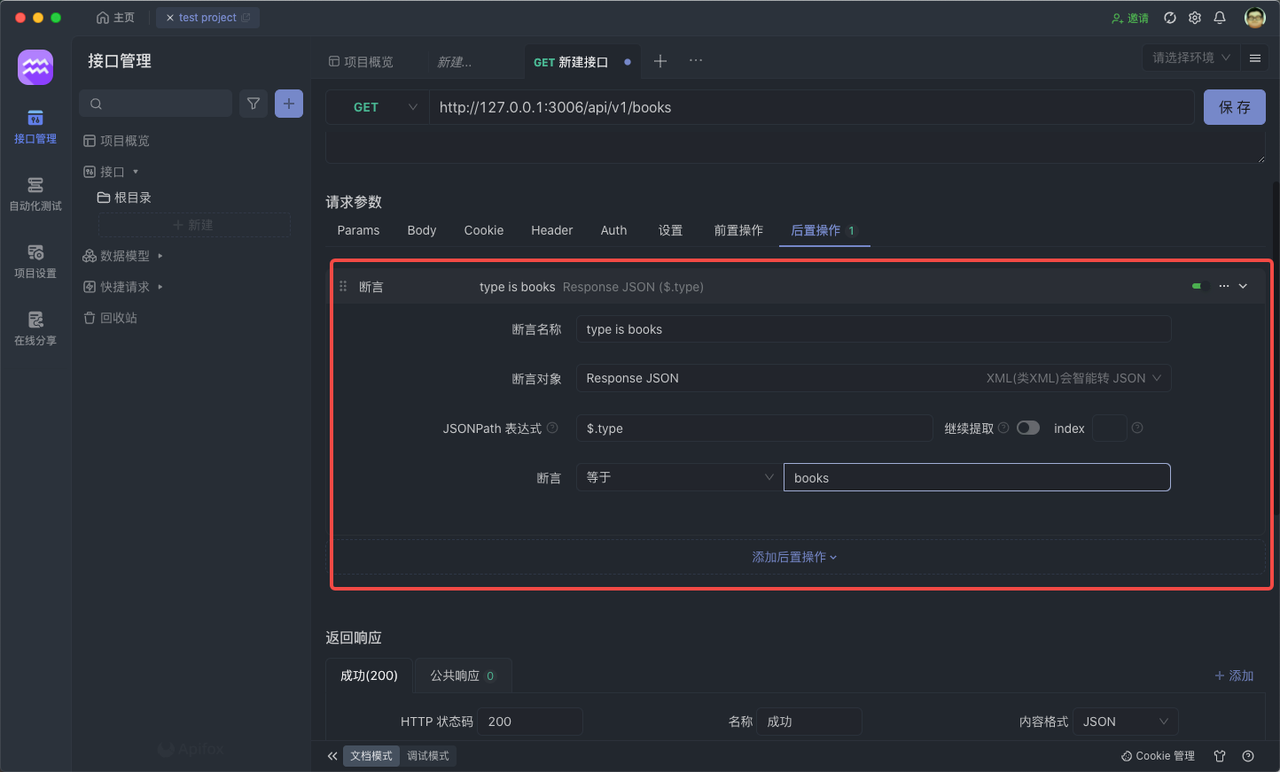
点击 保存 按钮。
新建测试用例
然后我们到 自动化测试 的界面,创建一个新的 测试用例。
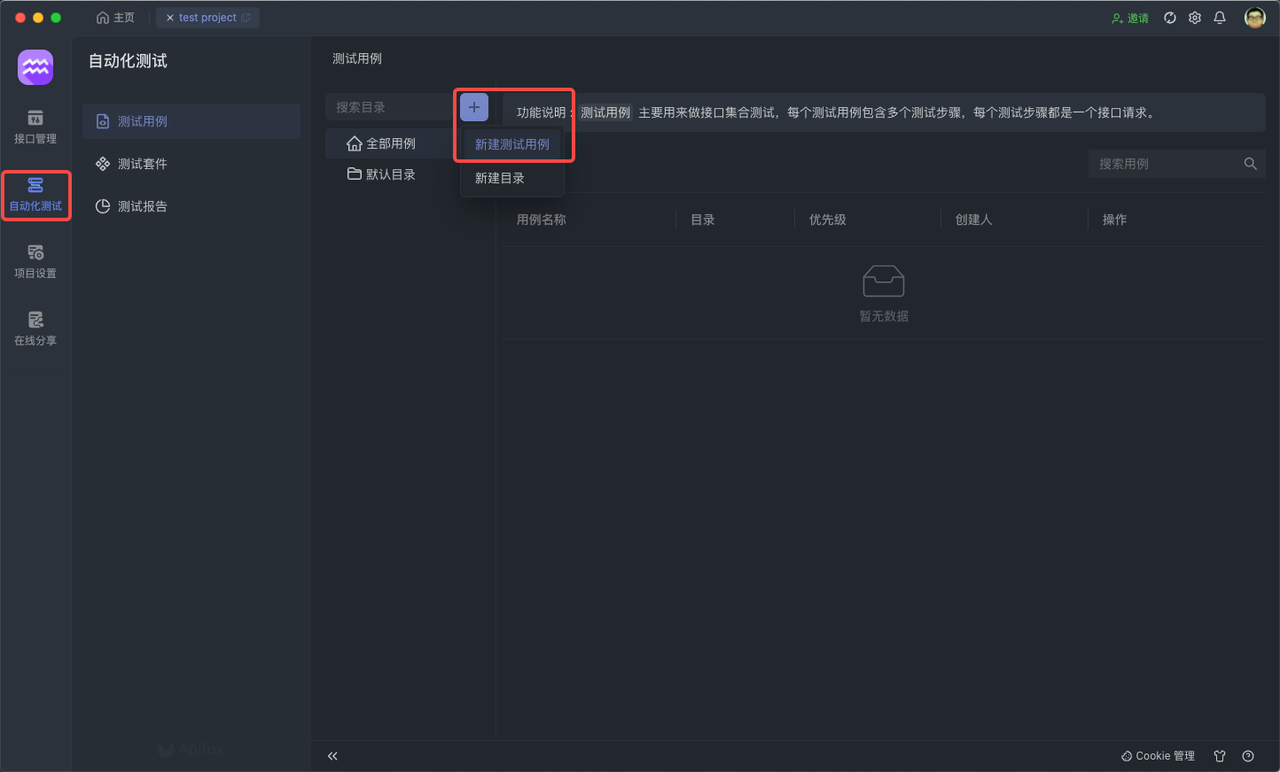
填入用例的基本信息,包括 名称、目录。

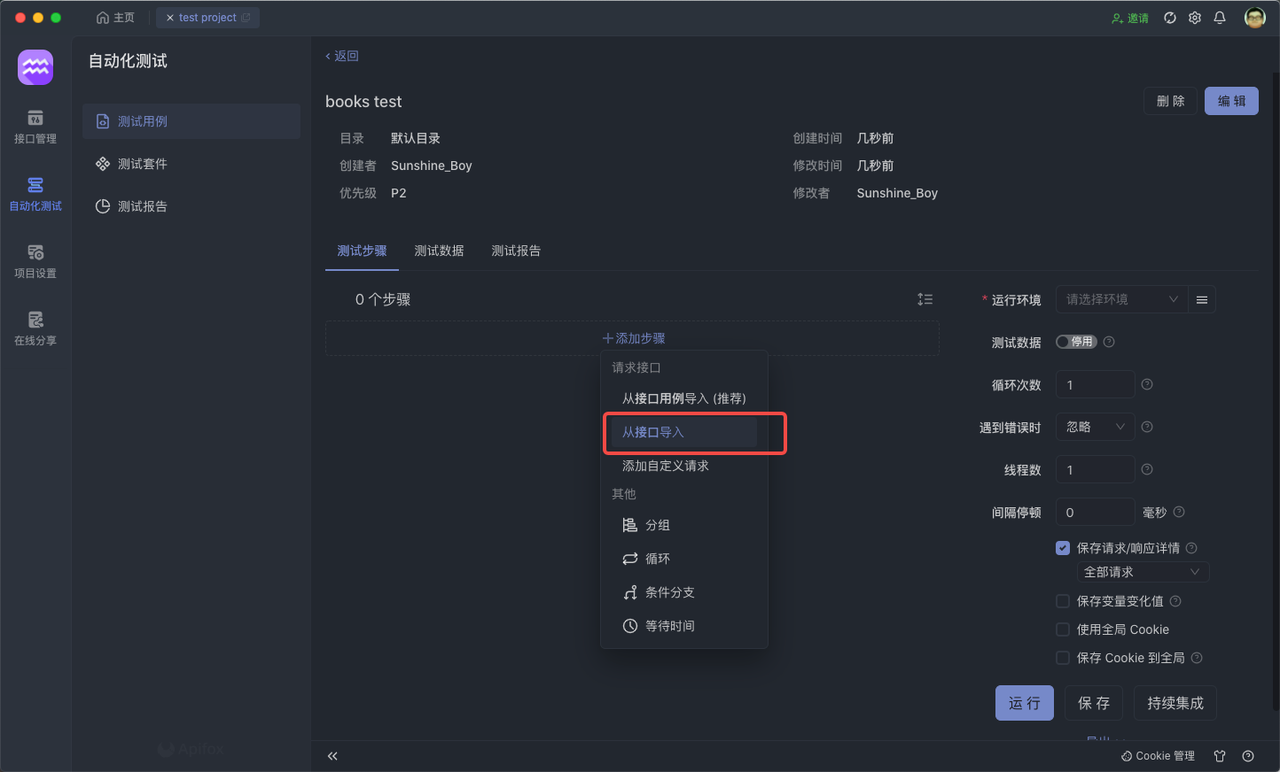
为用例新增接口
进入到创建好的 测试用例 中,选择导入接口。
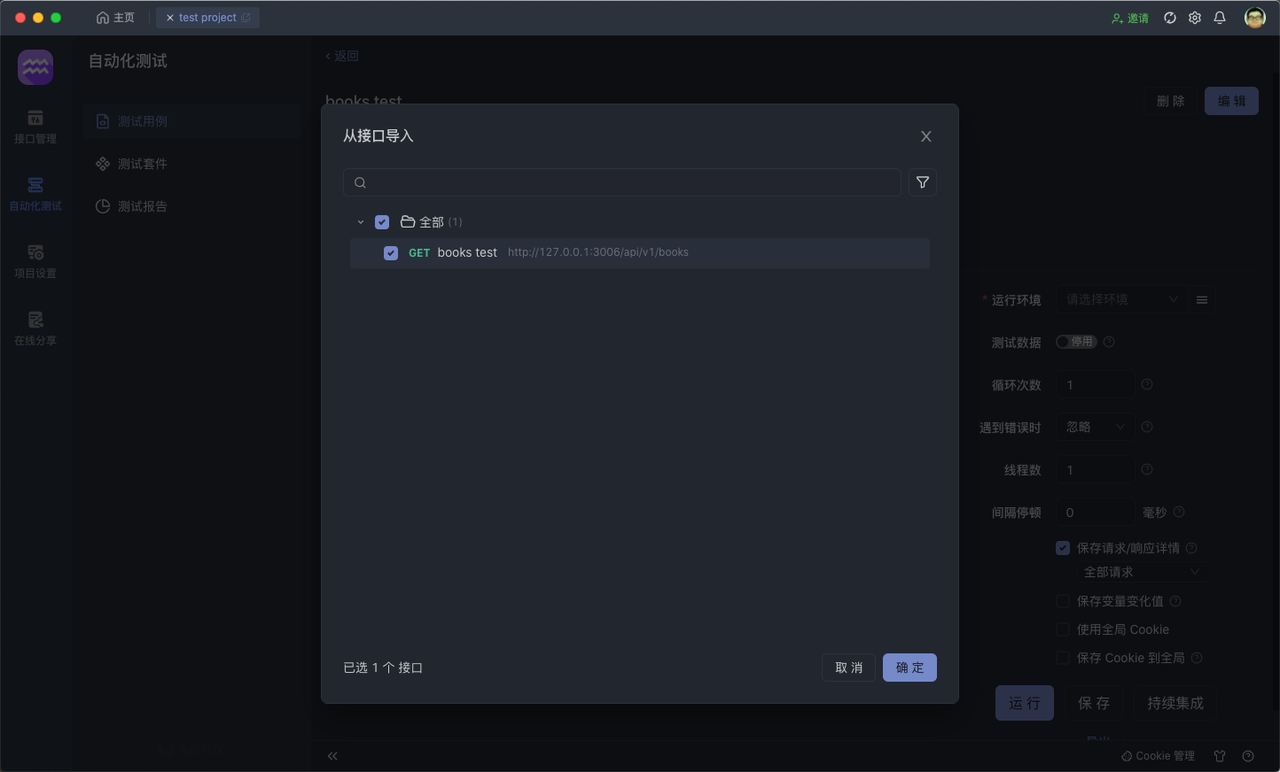
导入我们的目标接口。
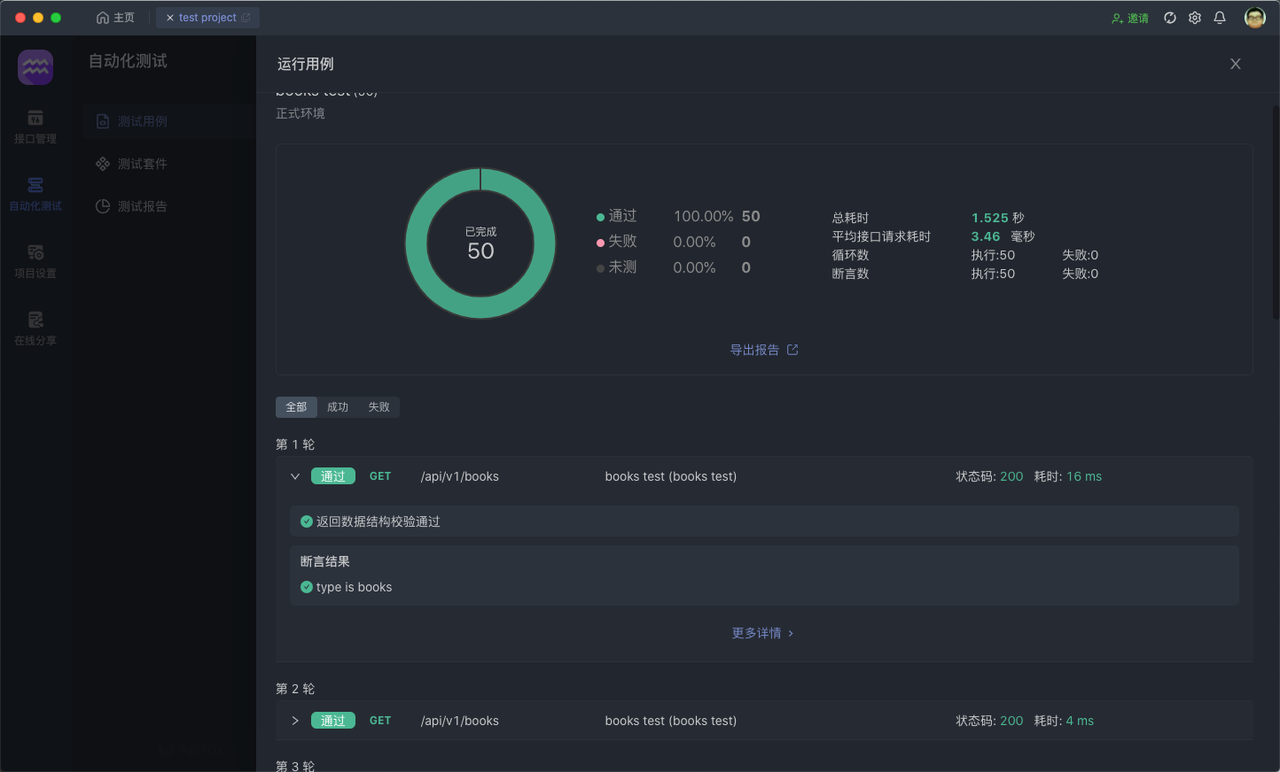
设置参数 运行
我们可以设置一些 运行参数,比如这里,我想运行这个接口 50 次。
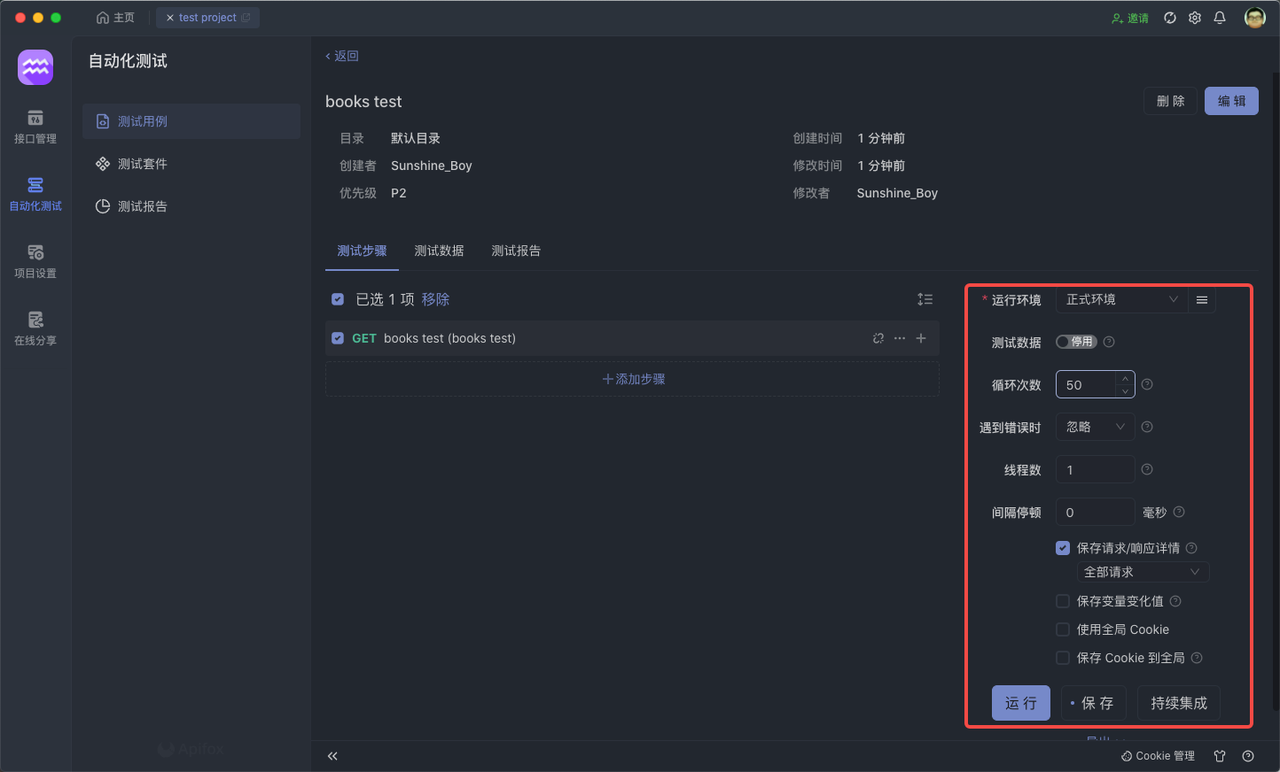
最后点击 运行 就可以查看运行结果了,Apifox 的自动化测试就是这么快速,简单,方便!!
关于 Apifox
Apifox 是一体化 API 协作平台,可以实现 API 文档、API 调试、API Mock、 API 自动化测试,是更先进的 API 设计/开发/测试工具。
Apifox 提供了一种全面的 API 管理解决方案。使用 Apifox ,你可以在统一的平台上设计、调试、测试以及协作你的 API,消除了在不同工具之间切换和数据不一致的问题。
个人使用体验还是不错的,点击免费使用~
知识扩展: