SoapUI+Groovy 接口自动化测试
工程
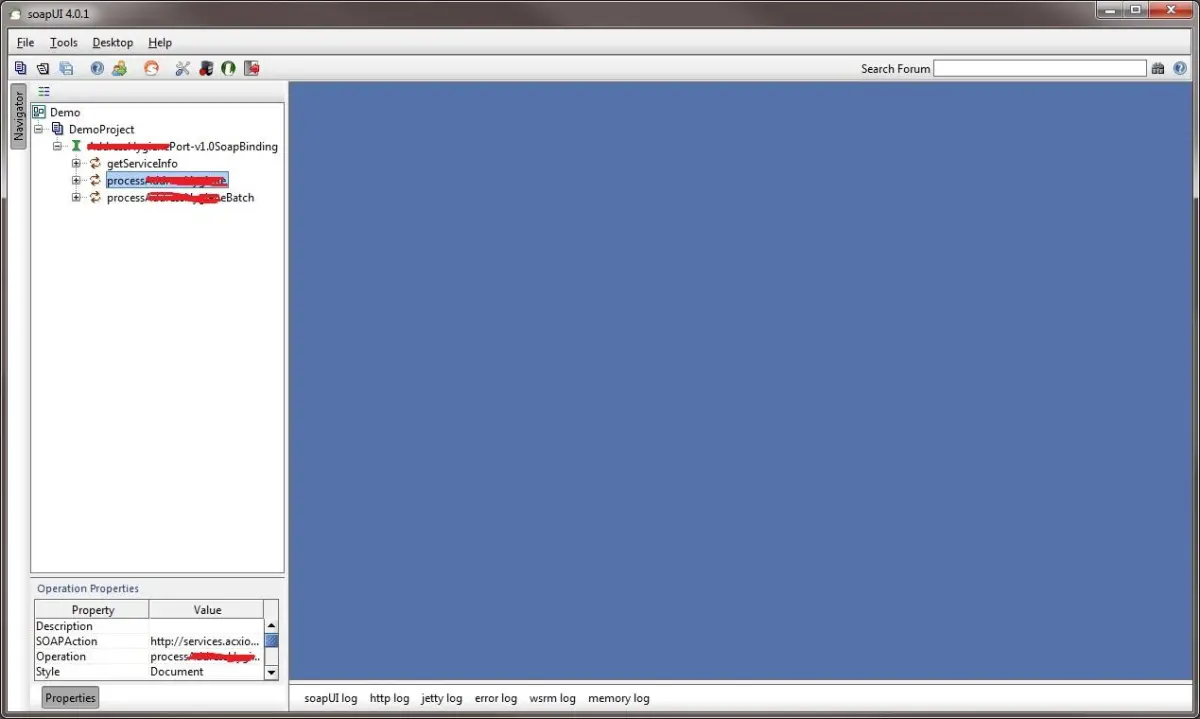
首先准备一个工程。
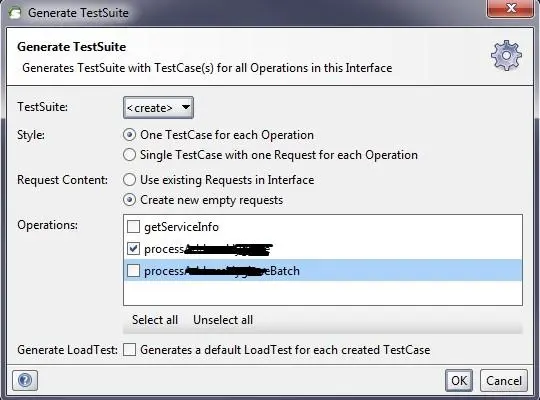
新建 TestSuit
TestSuit 也就是测试套件,一个测试套件中可以有多个测试用例(TestCase),是一对多的关系。

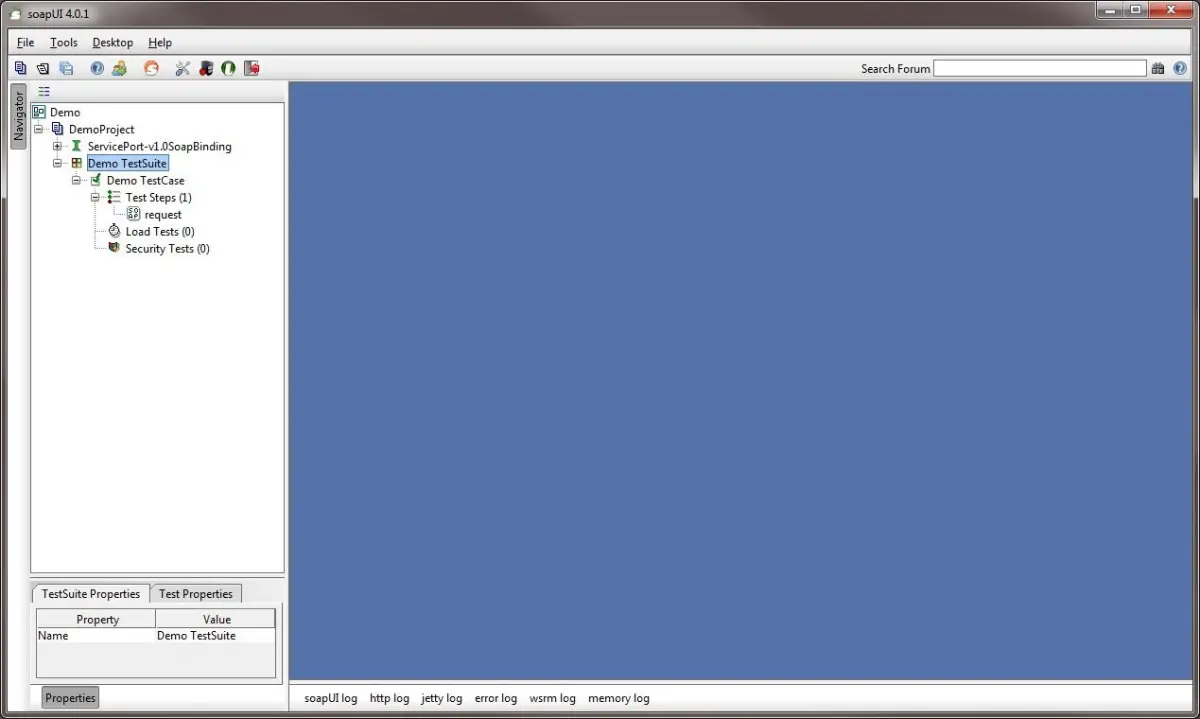
新建 TestCase
在刚刚创建的 TestSuit 中,创建 TestCase。
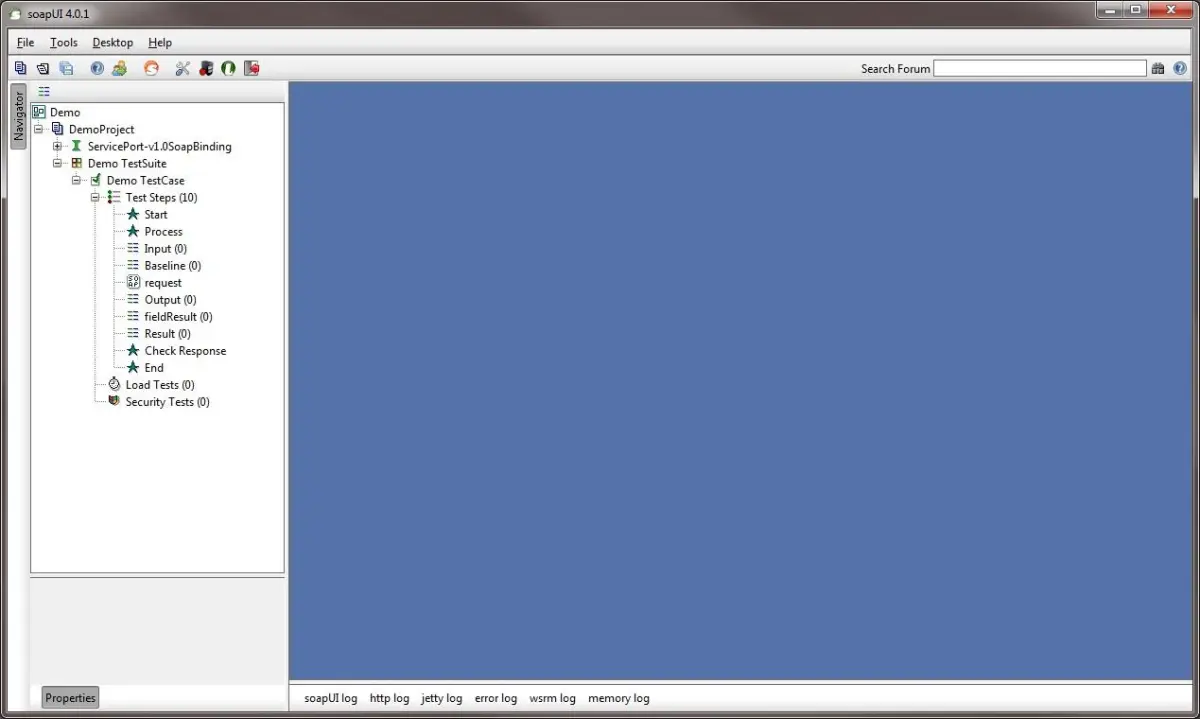
新建完,此时的 TestSuit 结构为:
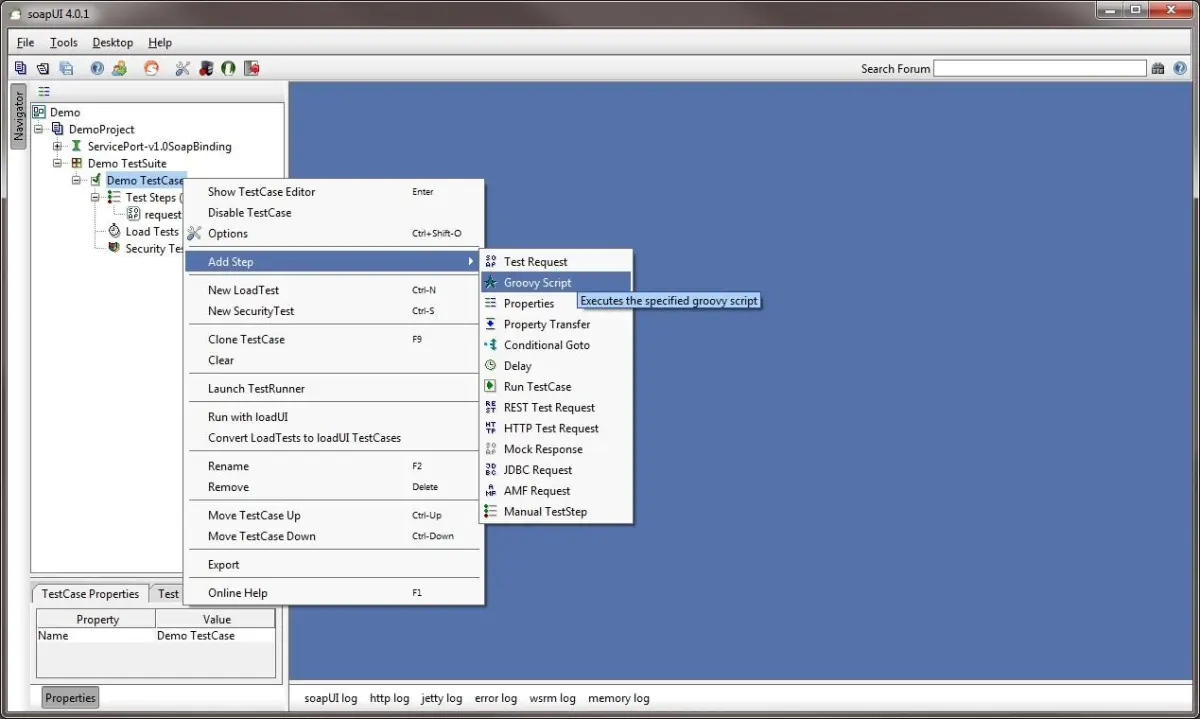
添加 Groovy 脚本
这一步中,需要添加 Groovy Script 和 Properties。
我们增加四个 Groovy Script:
- Start
- Process
- Check Response
- End
我们增加五个 Properties:
- Input
- Baseline
- Output
- Result
- fieldResult
最终的结构是这样的:
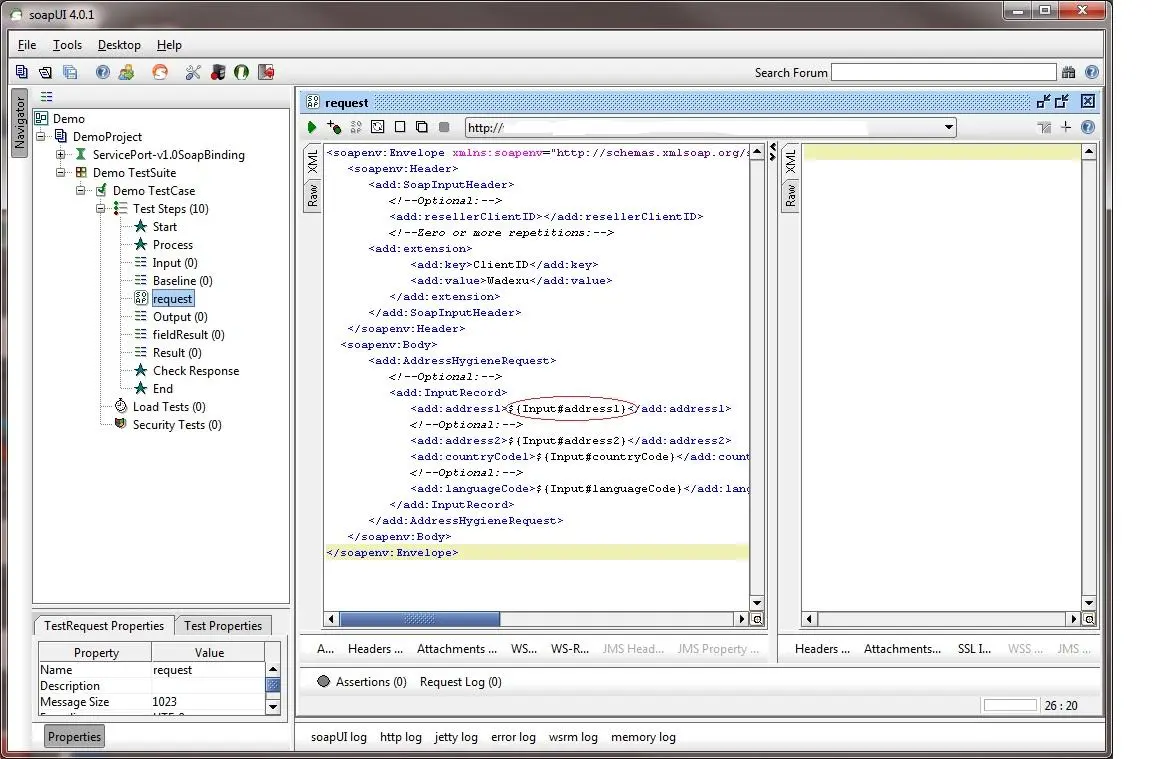
脚本内容
Start 脚本
import java.io.*;
def cal = Calendar.instance;
def sysdate = cal.getTime();
def Y = cal.get(Calendar.YEAR);
def M = cal.get(Calendar.MONTH) + 1;
def D = cal.get(Calendar.DATE);
if (D < 10) D = "0" + D;
if (M < 10) M = "0" + M;
date = Y + "-" + M + "-" + D;
time = sysdate.toString().replaceAll(':', '-')
def testSuites = testRunner.testCase.getTestSuite();
def testcase = testRunner.testCase;
def logFolder = new File(context.expand('${#Project#LogFolder}'));
def responseLogName = (context.expand('${#Project#LogFolder}') + date + '\' + testSuites.name + ' - ' + testcase.name + ' - ' + time + ".log");
def responseDetailLogName = (context.expand('${#Project#LogFolder}') + date + '\' + testSuites.name + ' - ' + testcase.name + ' - ' + time + " Response Detail.log");
def responseLogFile = new File(responseLogName);
def responseDetailLogFile = new File(responseDetailLogName);
def subFolder = new File(context.expand('${#Project#LogFolder}') + date + '\')
testcase.setPropertyValue('date', date);
testcase.setPropertyValue('LogFile - Check Response', responseLogName);
testcase.setPropertyValue('LogFile - Response Detail', responseDetailLogName);
if (!logFolder.exists()) {

  logFolder.mkdirs();

}
if (!subFolder.exists()) {

  subFolder.mkdirs();

}
if (!responseLogFile.exists()) {

  responseLogFile.createNewFile();

}
responseLogFile.append("---------------Test Start on " + sysdate + " ------------------------" + '\n');
if (!responseDetailLogFile.exists()) {
  responseDetailLogFile.createNewFile();
}
Process 脚本
result = new Object[2][rows + 3]

result[0][0] = 'Case Description';

result[1][0] = 'Result'

result[0][rows + 1] = 'Start Time:';

result[1][rows + 1] = sysdate.toString();


/*--New object and put the output name and value into this list--*/

output = new Object[baselineSize][rows]

outputTag = new Object[baselineSize][rows]

for (i = 0; i

    {

    output[i][0] = Baseline.getPropertyAt(i).name;

    outputTag[i][0] = 'PASS';

  }
    for (m = start_Test; m <= end_Test; m++) {
    logFile.append('\n' + testcase.name + ": " + m + " " + ". " + sysdate + '\n');
    for (i = 0; i
        {
        setProperties(input[i][0], input[i][m], inputSheetName)
      }
        for (j = 0; j
        {
          setProperties(baseline[j][0], baseline[j][m], baselineSheet)
        }
        testRunner.runTestStepByName(request.name);
    Thread.sleep(sleepTime);
    testRunner.runTestStepByName("Check Response");
    result[0][m] = context.expand('${' + inputSheetName + '#Case Description}')
    result[1][m] = context.expand('${' + resultSheet + '#result}')
    if (result[1][m] == 'PASS') {
      passNumbers++;
    }
    for (i = 0; i
        {
        output[i][m] = Output.getPropertyAt(i).value;
        outputTag[i][m] = fieldResult.getPropertyAt(i).value;
      }
}
result[0][rows + 2] = 'End Time:';
result[1][rows + 2] = sysdate.toString();
result[0][rows] = 'Pass Percentage:';
passPercentage = decFormat.format(passNumbers / (end_Test - start_Test + 1));
result[1][rows] = passPercentage
try {
  workbook = Workbook.getWorkbook(new File(xlsName));
  writableWorkbook = Workbook.createWorkbook(new File(xlsName), workbook);
  updateOutput(writableWorkbook, outputSheet, start_Test, end_Test + 1, baselineSize, output, outputTag);
  updateResult(writableWorkbook, resultSheet, start_Test, rows + 3, 2, result);
  removeSheetByName(writableWorkbook, ComparisonSheet);
  if (passPercentage != '100.00%') {
    updateComparison(writableWorkbook, ComparisonSheet, start_Test, end_Test + 1, baselineSize, output, outputTag, result, baseline);
  }
  writableWorkbook.write();
  writableWorkbook.close();
  workbook.close();
} catch (Exception e) {

  e.printStackTrace();

}
setProperties('passPercentage', passPercentage, 'Result');
testRunner.gotoStepByName('End');
Check Response 脚本
import java.lang.*;
import java.util.*;

import groovy.lang.*;
import groovy.util.*;
import com.eviware.soapui.support.XmlHolder
baselineSheet = "Baseline";
outputSheet = "Output";
resultSheet = "Result";
def testcase = testRunner.testCase;
Baseline = testcase.getTestStepByName(baselineSheet)
baselineSize = Baseline.getPropertyCount();
Output = testcase.getTestStepByName(outputSheet);
def requests = testcase.getTestStepsOfType(com.eviware.soapui.impl.wsdl.teststeps.WsdlTestRequestStep.class)
def request = requests[0];
def response = request.testRequest.response;
respXmlHolder = new XmlHolder(response.contentAsXml)
respXmlHolder.declareNamespace("ns1", "http://schemas.xxx.com/v201203/yourservice")
def statusCode = request.testRequest.response.responseHeaders["#status#"].toString();
def setProperties(Name, Value, Place){
  name = Name;
  target = testRunner.testCase.getTestStepByName(Place);
  target.setPropertyValue(name, Value);
}
def getspecifiedValue(field){
  prefix = "//ns1:";
  nodePath = "${prefix}${field}"
  specifiedValue = respXmlHolder.getNodeValue("${nodePath}")
}
testRunner.testCase.getTestStepByName(outputSheet).clearPropertyValues();
if (statusCode.contains('200 OK')) {
  for (i = 1; i
      {
      specifiedName = Baseline.getPropertyAt(i).name;
      specifiedValue = getspecifiedValue(specifiedName);
      if(specifiedValue != null) {
    setProperties(specifiedName, specifiedValue, outputSheet)
  } else {
    setProperties(specifiedName, '', outputSheet)
  }
}
} else
{
  setProperties(Baseline.getPropertyAt(0).name, Baseline.getPropertyAt(0).value, outputSheet);
  setProperties(Baseline.getPropertyAt(1).name, statusCode, outputSheet);
  for (t = 2; t
            setProperties(Baseline.getPropertyAt(t).name, '', outputSheet);
}
}
setProperties(Baseline.getPropertyAt(0).name, Baseline.getPropertyAt(0).value, outputSheet);
setProperties('result', 'PASS', resultSheet);
logFile = new File(context.expand('${#TestCase#LogFile - Check Response}'));
responseDetailLogFile = new File(context.expand('${#TestCase#LogFile - Response Detail}'));
logFile.append(" ------                  Start Response Check " + " @ " + Calendar.instance.getTime() + "\n");
responseDetailLogFile.append("\n" + testcase.name + " -- " + Baseline.getPropertyAt(0).value + "\n" + response + "\n");
for (i = 0; i
{
    if(Baseline.getPropertyAt(i).value == Output.getPropertyAt(i).value)
                {
  setProperties(Baseline.getPropertyAt(i).name, 'PASS', 'fieldResult');
}
 else
{
  setProperties(Baseline.getPropertyAt(i).name, 'FAIL', 'fieldResult');
  setProperties('result', 'FAIL', 'Result');
}
}
End 脚本
def cal = Calendar.instance;
def sysdate = cal.getTime();
responseLogFile = new File(context.expand('${#TestCase#LogFile - Check Response}'));
responseDetailLogFile= new File(context.expand('${#TestCase#LogFile - Response Detail}'));
responseLogFile.append('\n'+ "---------------Test End on " + sysdate.toString() + " ------------------------"+'\n');
responseDetailLogFile.append('\n'+ "---------------Test End on " + sysdate.toString() + " ------------------------"+'\n');
配置
接下来还需要做一些配置。
- Properties 的添加
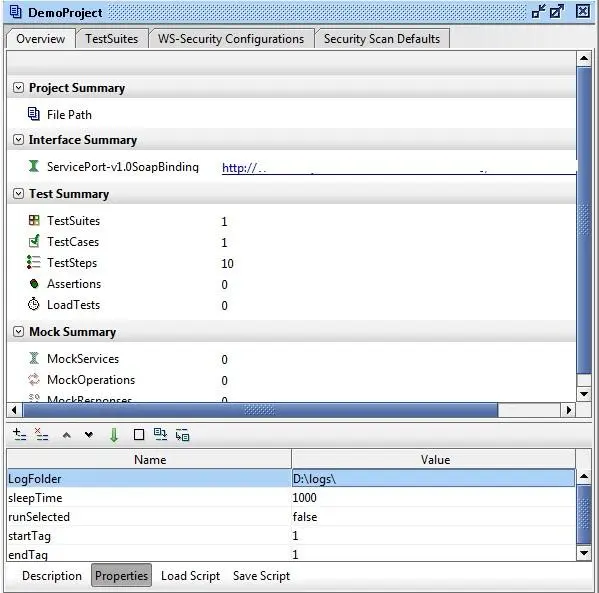
- 配置参数
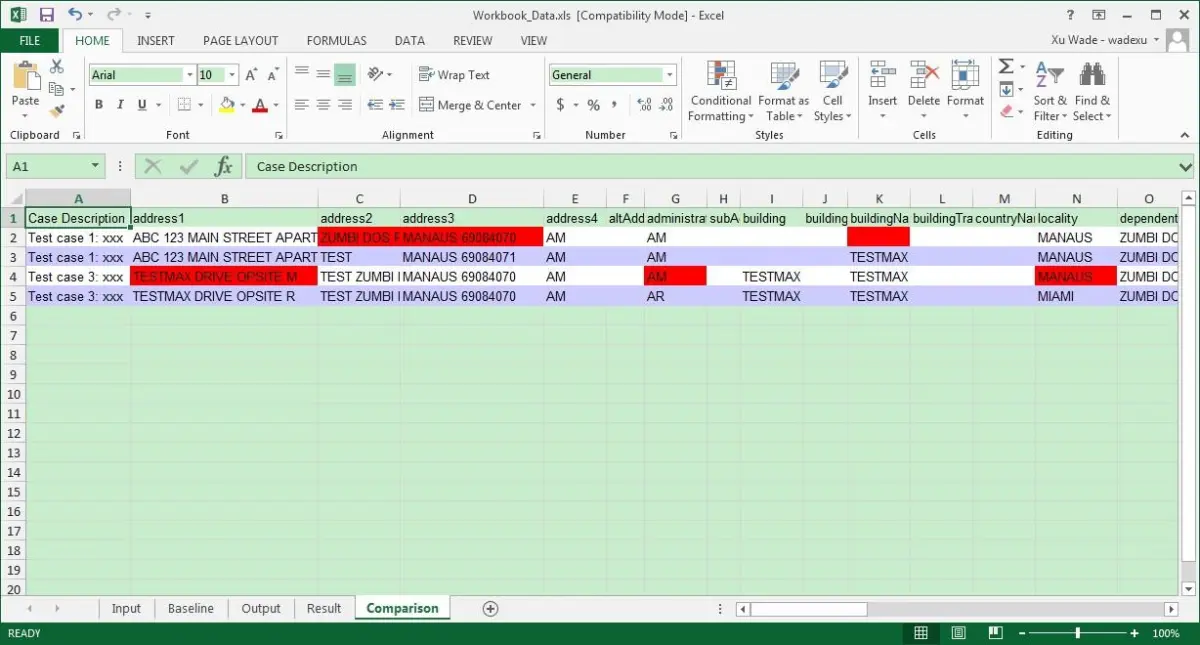
运行
点击 Run 运行 TestSuit
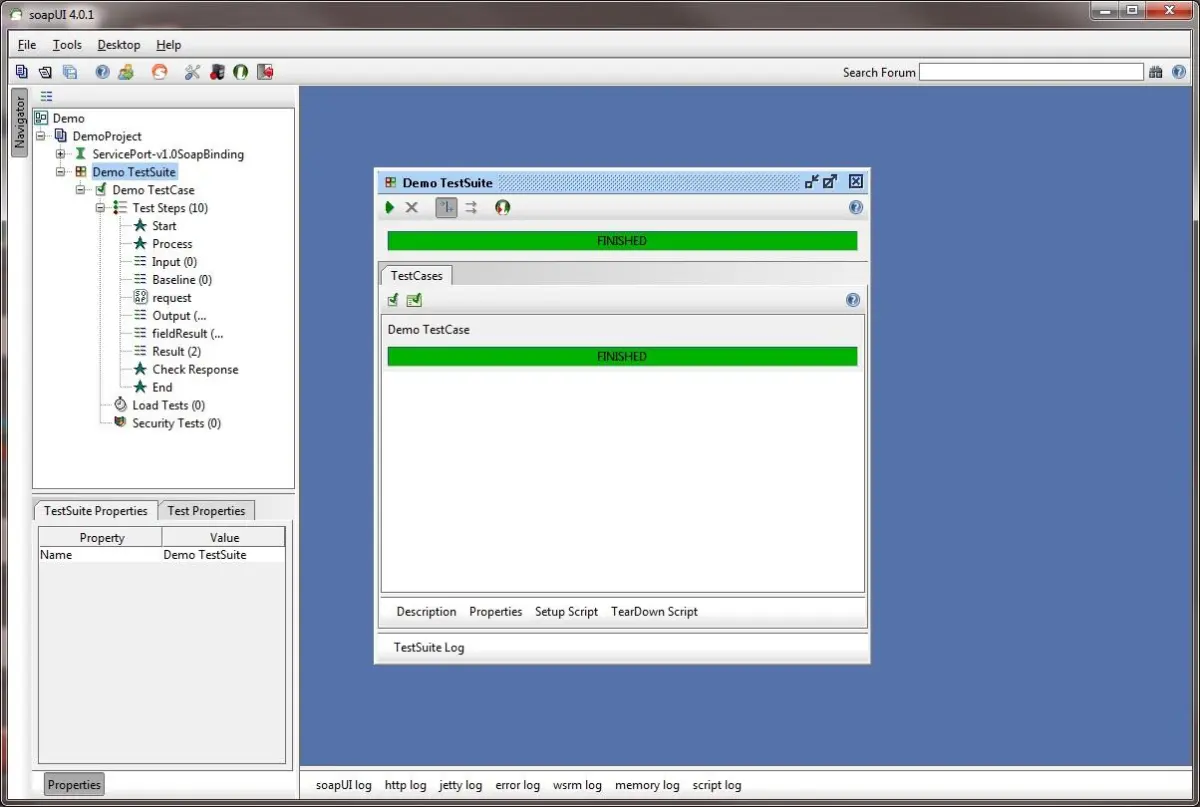
并得到结果
结束
很费时!
经过上面的一系列 SoapUI 使用 Groovy 脚本 进行自动化测试的过程,我真的觉得太麻烦了,而且也不支持中文、还要写那么多代码,一开始让人很难受,很难入门~
所以我还是选择另一个 API 工具来做 自动化测试 吧~
Apifox 自动化测试
Apifox 的优点有很多,针对以上指出的缺点, Apifox 提供了:
- 默认支持中文的界面显示,这对英语不好的人非常友好,大大降低上手的难度和门槛,而 SoapUI 默认不支持中文很让人头疼~
- 可视化的接口测试选项,你可以在 Apifox 的接口界面中,利用它提供的可视化功能,选择断言、自定义脚本、连接数据库等操作,你甚至可以一行脚本都不需要写,就能完成对一个接口的校验~
- 有了测试用例,你可以批量对一大批接口进行测试,有了测试套件,你可以一次性测试多个测试用例,非常方便,你可以设置循环数、环境、延迟数等配置参数,可配置程度相当高,满足你的运行需求~
- 测试结果可查看详细的测试参数,并且可以查看某一个接口的测试详细信息结果,并可单独运行。如果你想把测试结果分享给队友,你甚至可以导出测试报告,分享给你的团队成员们看~
- 支持 apifox-cli 命令行进行运行测试用例,只需要将测试用例的 url,复制到终端,即可随时去运行这个测试用例,而不需要打开客户端~
接下来,让我带大家实践一遍 Apifox 的自动化测试流程吧~
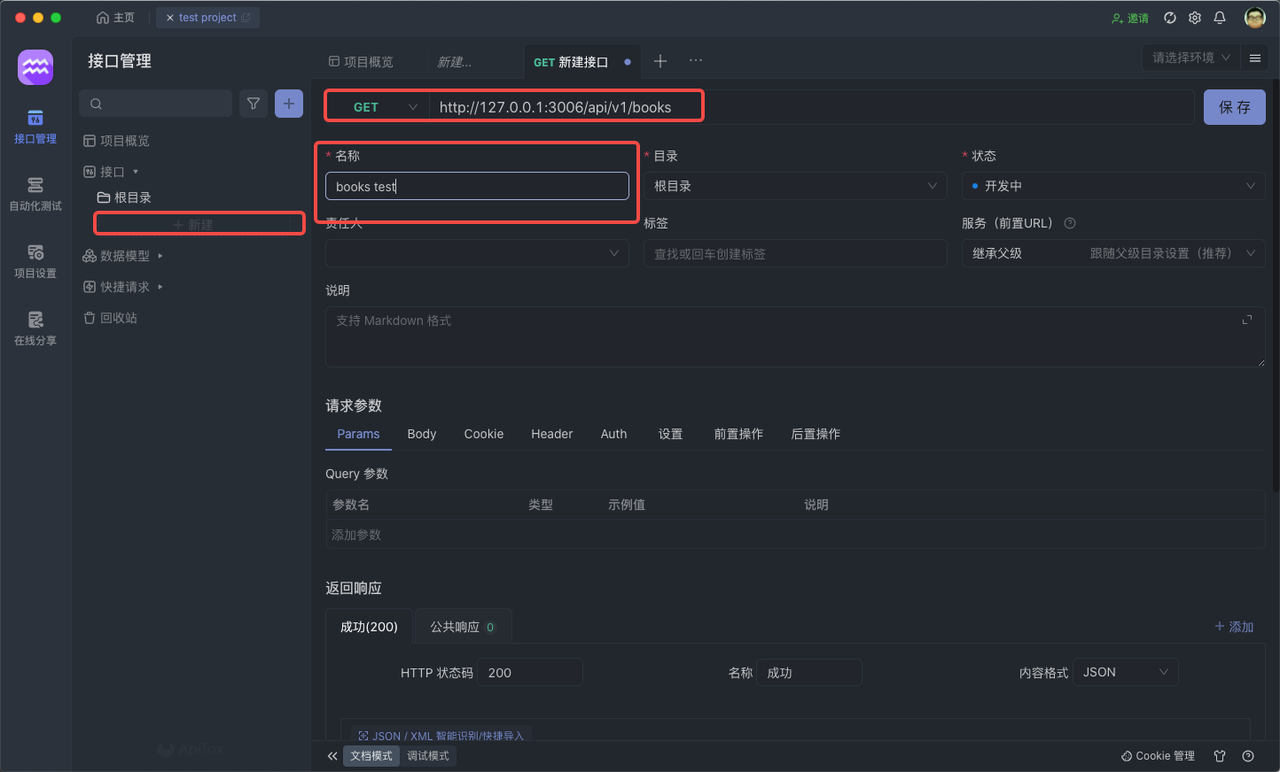
创建接口
首先我们需要创建一个接口:
设置断言
Apifox 支持可视化断言,非常方便,你甚至不需要写脚本代码~
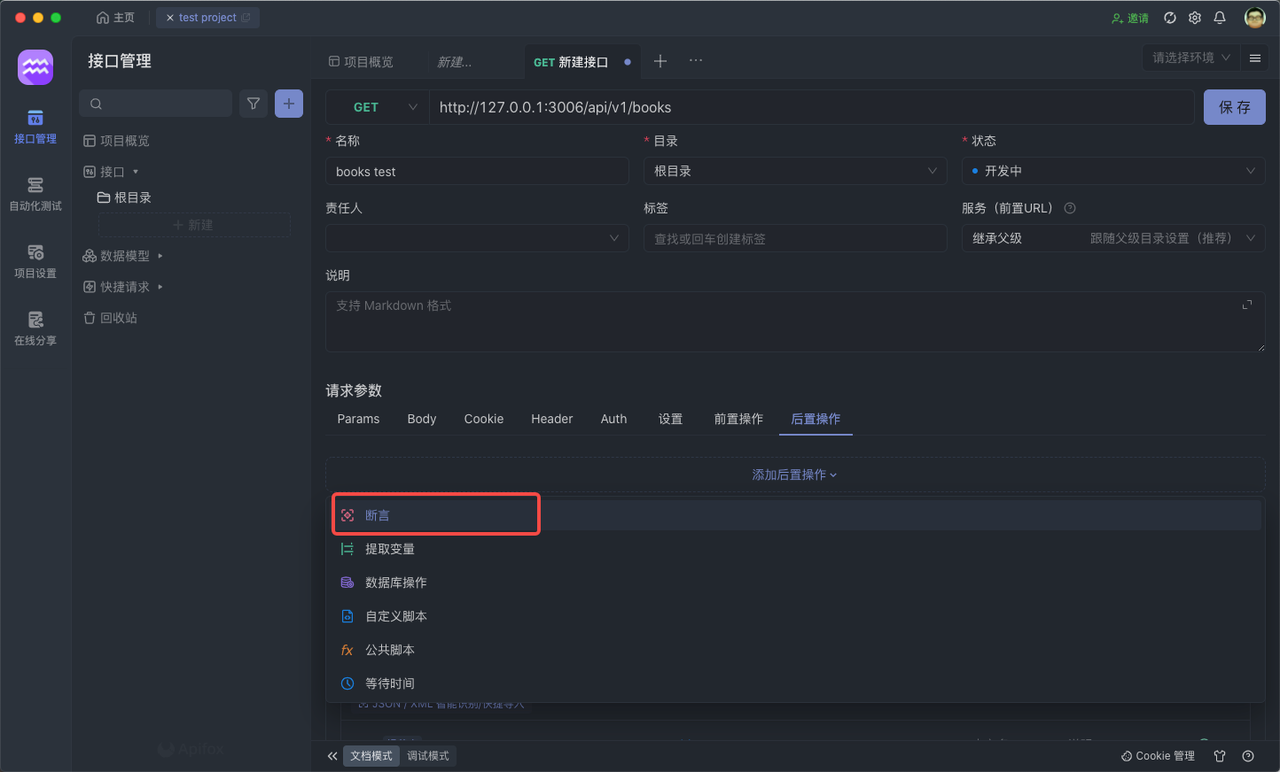
直接在 Apifox 提供的表单里填写对应的信息即可,不需要写脚本代码。
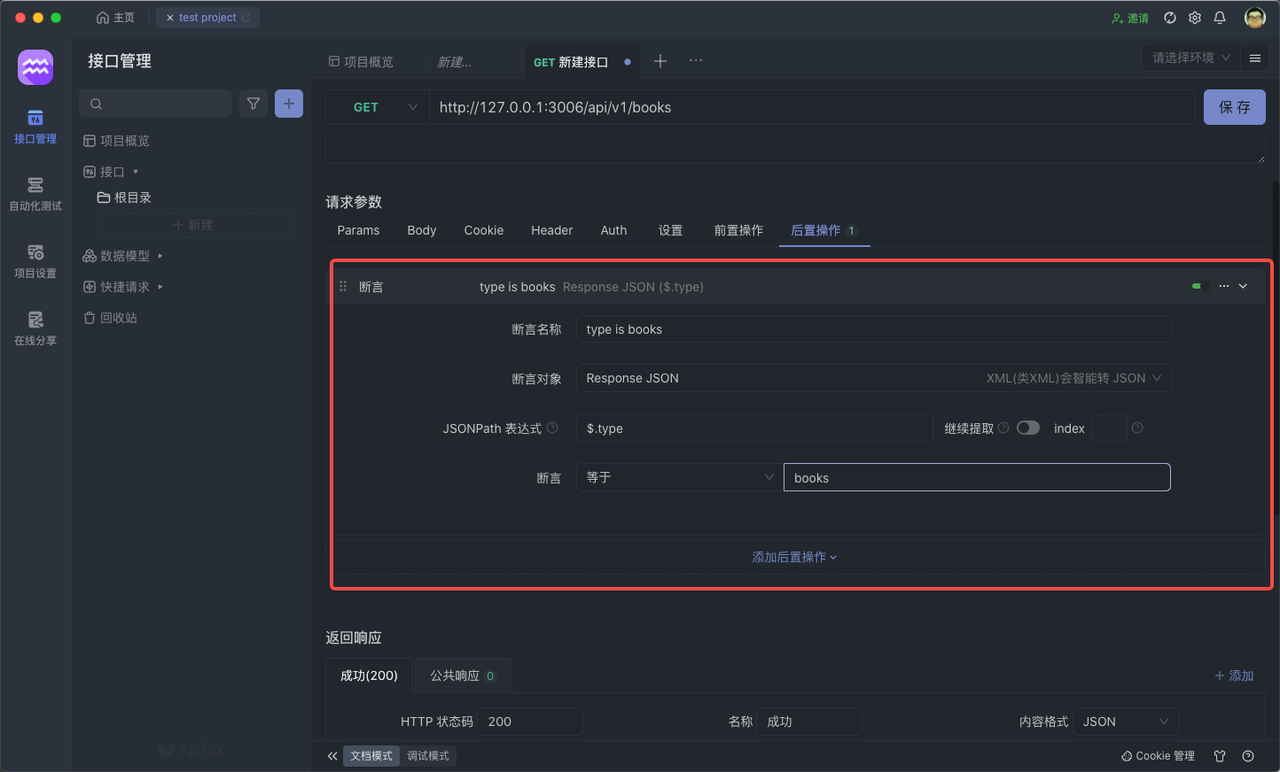
点击 保存 按钮。
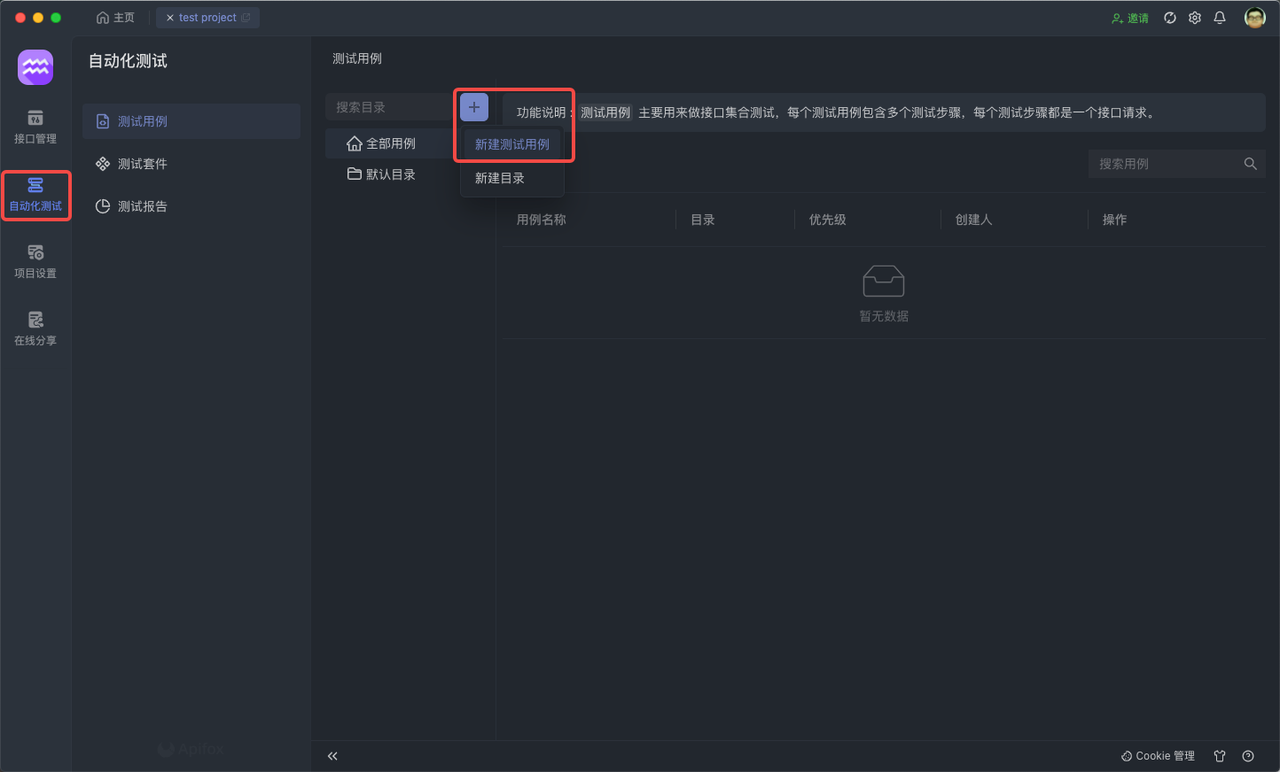
新建测试用例
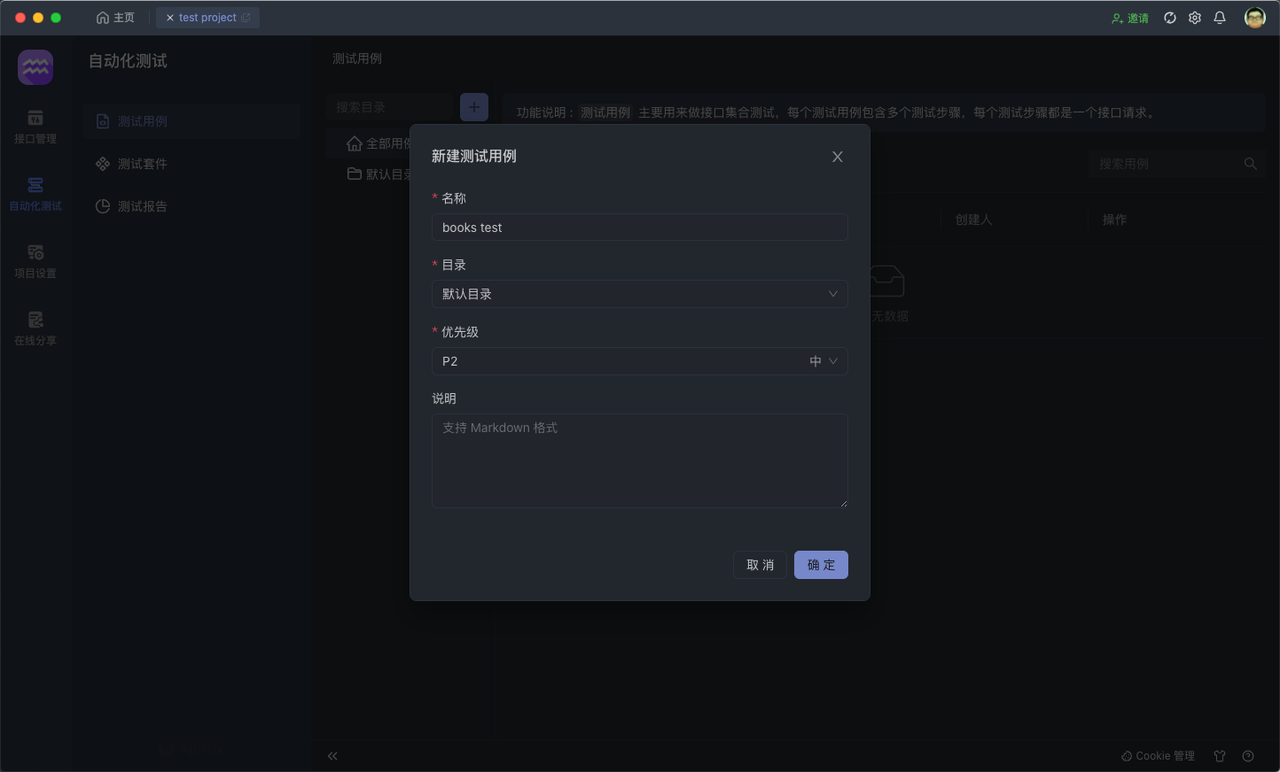
然后我们到 自动化测试 的界面,创建一个新的 测试用例。
填入用例的基本信息,包括 名称、目录。
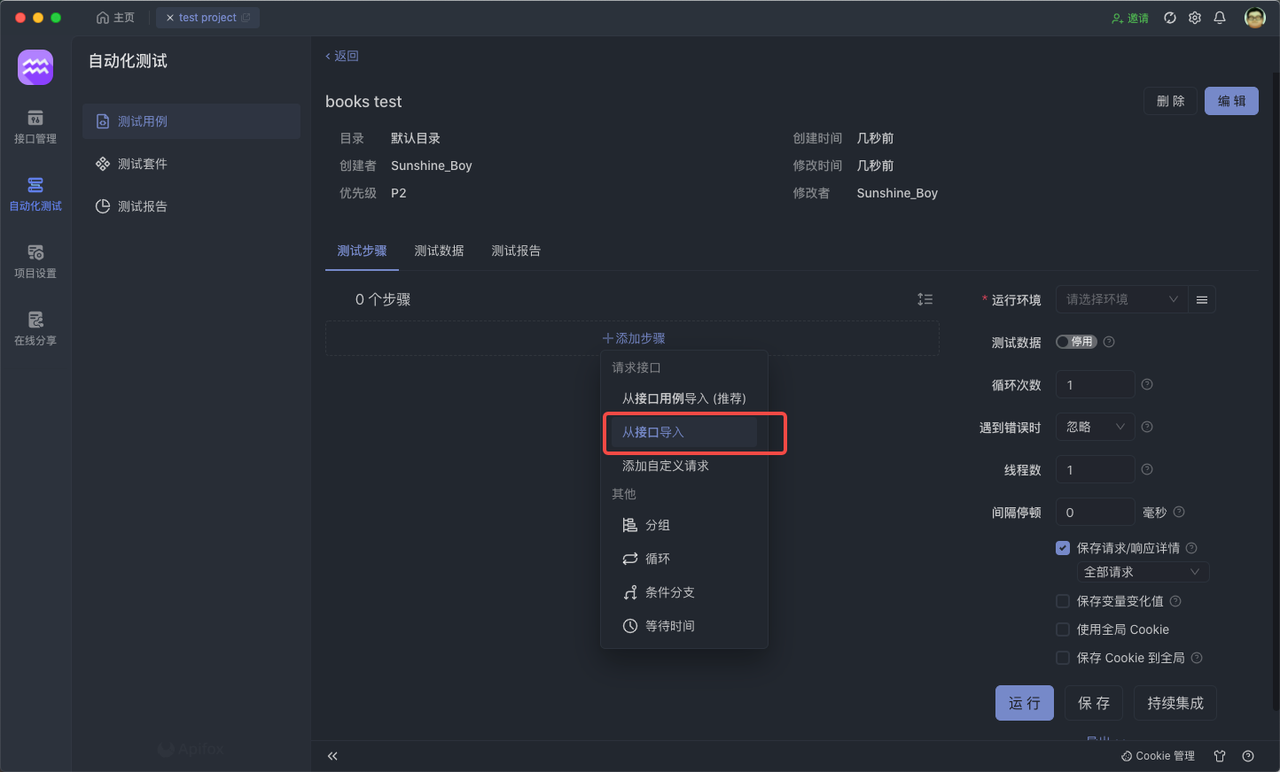
为用例新增接口
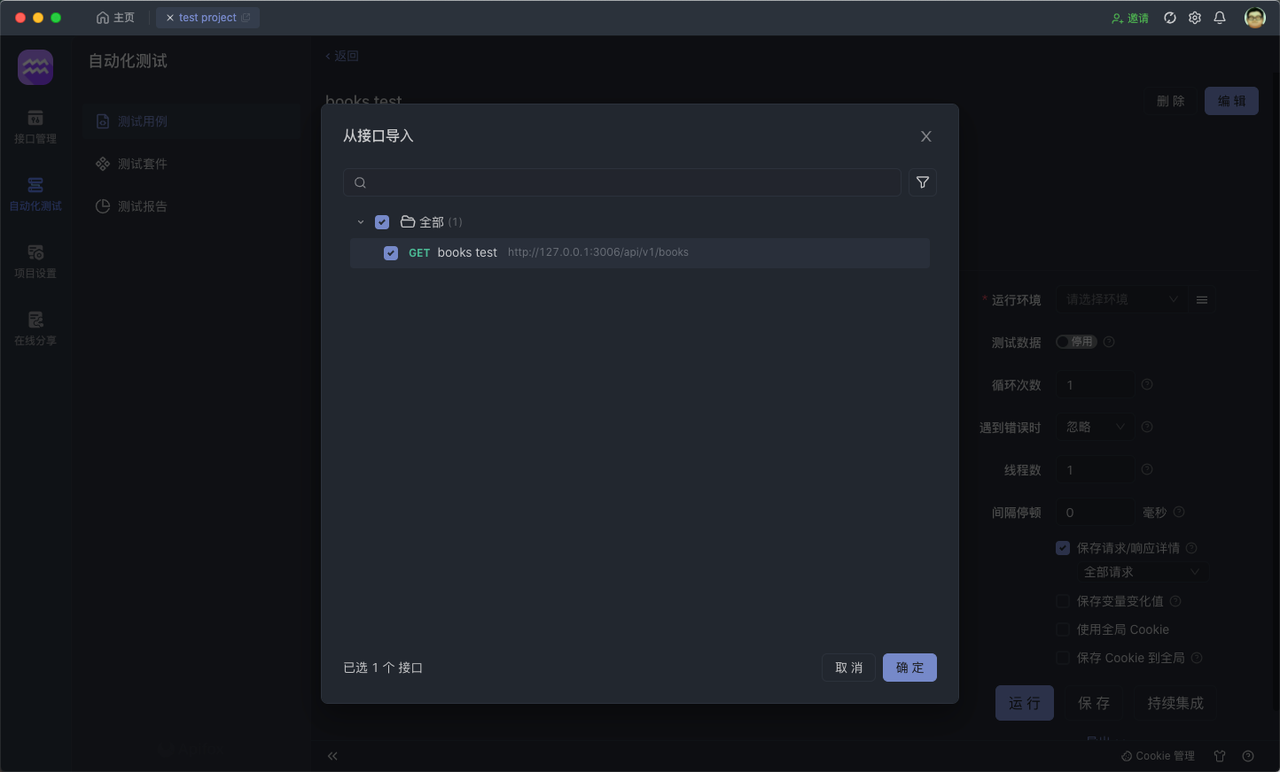
进入到创建好的 测试用例 中,选择导入接口。
导入我们的目标接口。
设置参数 运行
我们可以设置一些 运行参数,比如这里,我想运行这个接口 50 次。
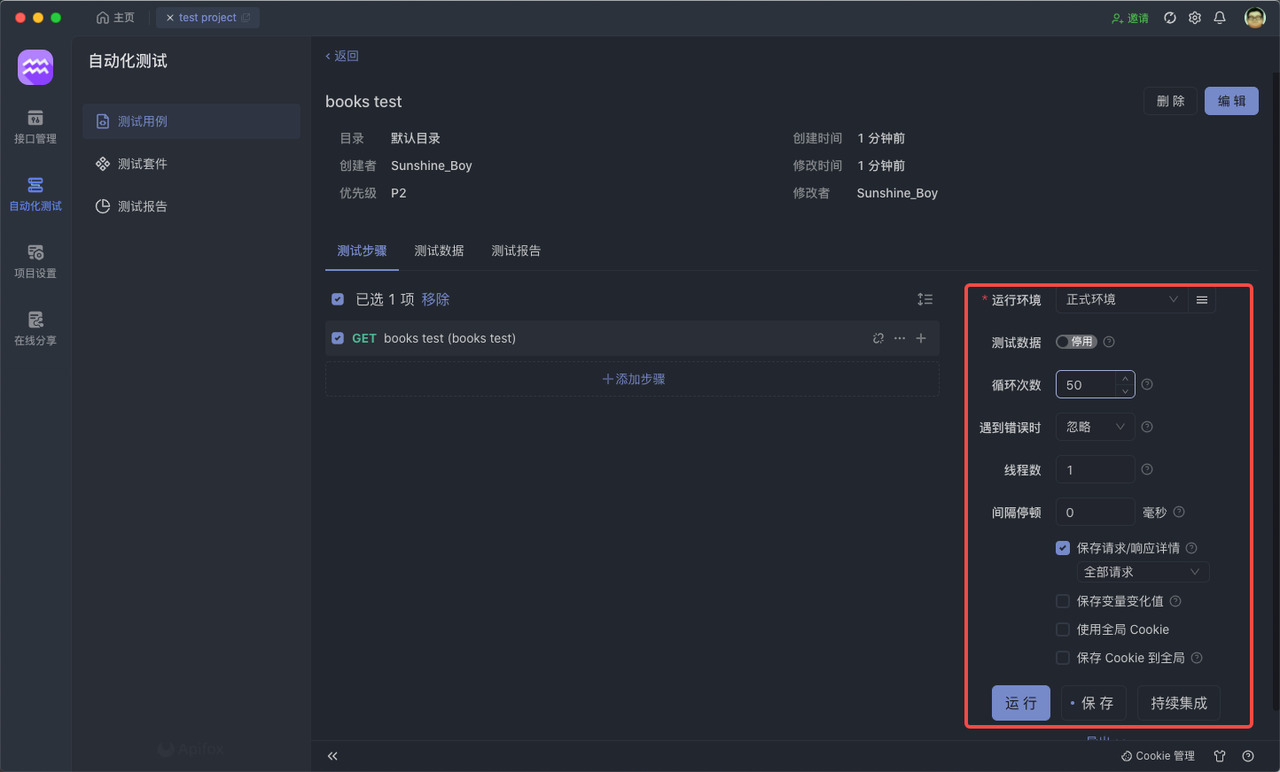
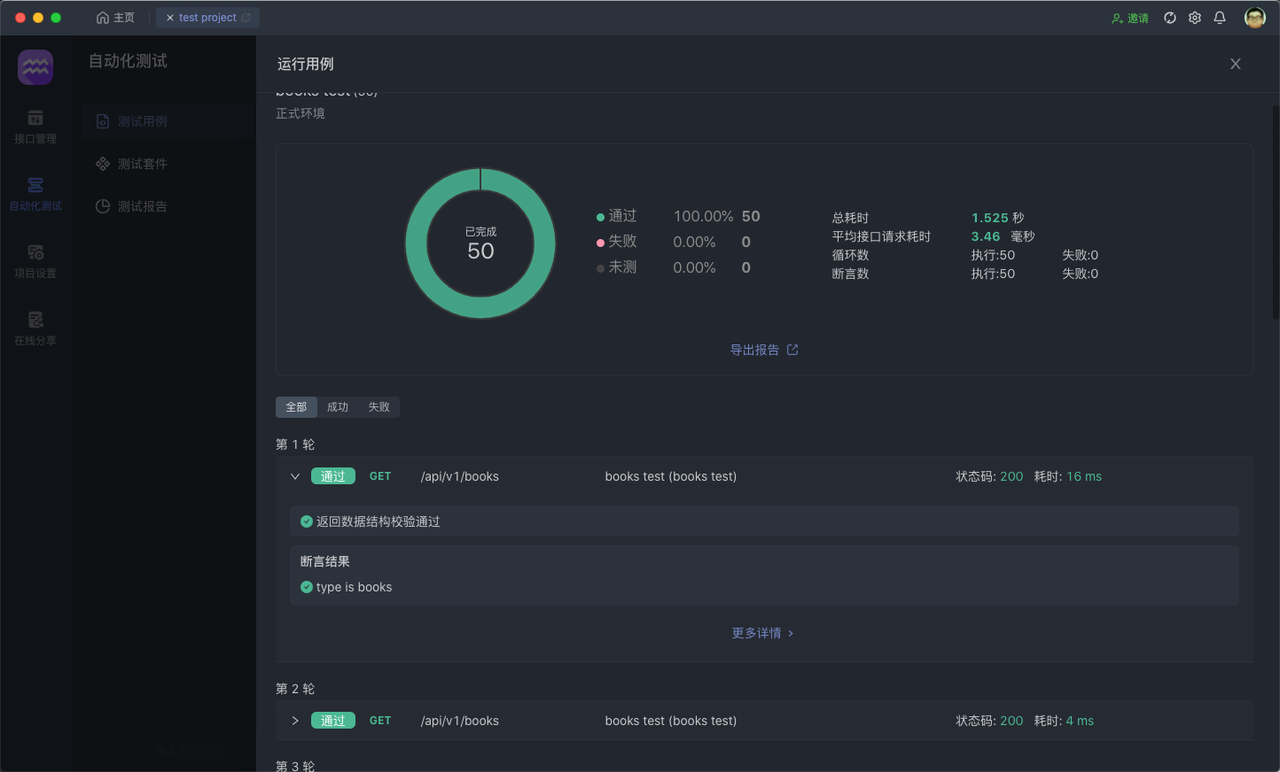
最后点击 运行 就可以查看运行结果了,Apifox 的自动化测试就是这么快速,简单,方便!!
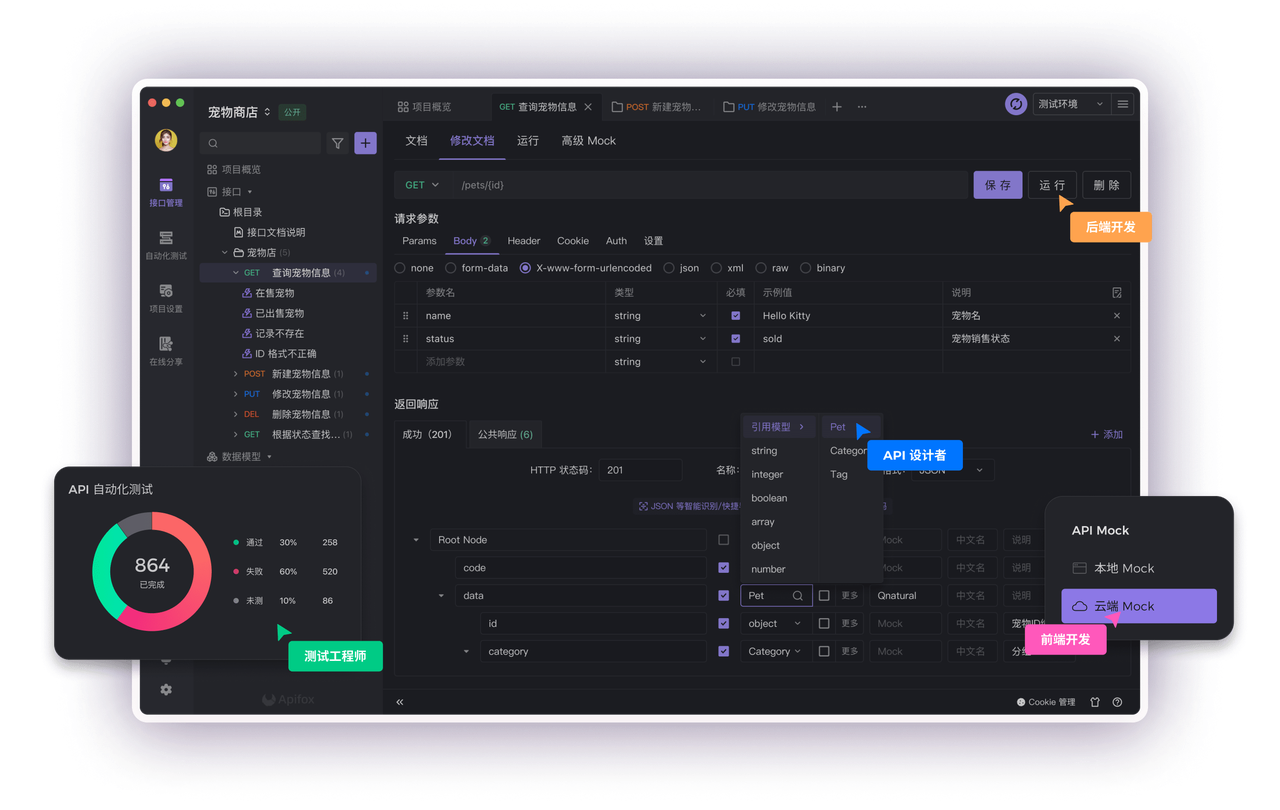
Apifox
Apifox 是一体化 API 协作平台,可以实现 API 文档、API 调试、API Mock、 API 自动化测试,是更先进的 API 设计/开发/测试工具。
Apifox 提供了一种全面的 API 管理解决方案。使用 Apifox ,你可以在统一的平台上设计、调试、测试以及协作你的 API,消除了在不同工具之间切换和数据不一致的问题。
个人使用体验还是不错的,推荐使用~
知识扩展: