Google 于 2026 年 10 月 6 日发布 Nano Banana 2.1,现在已可通过 Gemini API 以 gemini-nano-banana-2.1 调用。它是 Nano Banana 2(Gemini 3.1 Flash Image)的升级版,视觉质量更好,支持蒙版式编辑,跨轮次的角色一致性也更强。而且在两者共有的每个分辨率档位上,单张图片价格只有 Nano Banana 2 的一半。
本指南从一个空终端开始,一路走到保存出第一张图片,然后覆盖宽高比、2K/4K 输出、图像编辑、多轮修改、参考图、搜索落地(grounding)和成本。下面的每个请求都可以保存到 Apifox 里反复回放,方便你把 2.1 和现在在用的模型做对比。
AI Coding 交流群
如果你也在用 AI 写代码,或者正在研究 Cursor、Claude Code 这些工具,欢迎加入以下交流群。群里平时会聊一些 AI 编程的实际用法、开发工作流,还有各种新工具和新玩法。

想先了解背景?可以读《什么是 Nano Banana 2.1》,了解有哪些变化、Google 还没公布哪些信息。
准备工作
| 项目 | 内容 |
|---|---|
| Base URL | https://generativelanguage.googleapis.com/v1beta |
| Auth header | x-goog-api-key: $GEMINI_API_KEY |
| Model ID | gemini-nano-banana-2.1 |
| 接口 | POST /v1beta/interactions |
| 分辨率 | 1K(默认)、2K、4K |
| 输入 | 文本、图片(最多 14 张参考图)、视频 |
| Python SDK | pip install google-genai |
| JavaScript SDK | npm install @google/genai |
所有示例都使用 Interactions API——Google 的图像生成文档在 2.1 上用的就是它。
第 1 步:获取 Gemini API key
- 打开 Google AI Studio 并登录。
- 进入 Get API key,在一个 Google Cloud 项目中创建 key。
- 为该项目开通计费。Google 的价格页面把 Nano Banana 2.1 的免费档列为 “Not available”,所以 API 调用需要付费项目。
- 导出 key:
export GEMINI_API_KEY="your-key-here"
Google 把 2.1 接入了 AI Studio playground,用来测试提示词很方便,但 Google 没有公布免费账号在那里能生成多少张。《免费使用 Nano Banana 2.1 的方法》覆盖了这条路线,《如何免费获取 Gemini API key》则更详细地讲了 key 的申请流程。
第 2 步:生成第一张图片
curl
curl -s -X POST "https://generativelanguage.googleapis.com/v1beta/interactions" \
  -H "x-goog-api-key: $GEMINI_API_KEY" \
  -H "Content-Type: application/json" \
  -d '{
    "model": "gemini-nano-banana-2.1",
    "input": [
      {"type": "text", "text": "Create a picture of a nano banana dish in a fancy restaurant with a Gemini theme"}
    ]
  }'
响应是 JSON。图片以 base64 数据的形式放在 image 内容块里,所以你需要用 SDK(或脚本)来解码。
Python
from google import genai
import base64

client = genai.Client()  # reads GEMINI_API_KEY

interaction = client.interactions.create(
    model="gemini-nano-banana-2.1",
    input="Create a picture of a nano banana dish in a fancy restaurant with a Gemini theme",
)

with open("generated_image.png", "wb") as f:
    f.write(base64.b64decode(interaction.output_image.data))
interaction.output_image 返回最后生成的图片块。它的 data 字段是 base64,写文件前要先解码。
JavaScript
import { GoogleGenAI } from "@google/genai";
import * as fs from "node:fs";

const ai = new GoogleGenAI({});

const interaction = await ai.interactions.create({
  model: "gemini-nano-banana-2.1",
  input: "Create a picture of a nano banana dish in a fancy restaurant with a Gemini theme",
});

const image = interaction.output_image;
if (image) {
  fs.writeFileSync("nano-banana.png", Buffer.from(image.data, "base64"));
}
Gemini 3 的图像模型会先思考再作画。在规划构图的过程中,模型可能产出最多两张中间“思考图”。这部分不收费,而且 API 里无法关闭思考。
第 3 步:设置宽高比、分辨率和纯图片输出
用 response_format 控制输出。设置 "type": "image" 后只返回图片、不再带对话文本,响应更小、解析更简单。
interaction = client.interactions.create(
    model="gemini-nano-banana-2.1",
    input="A product shot of a matte black coffee grinder on a marble counter",
    response_format={
        "type": "image",
        "mime_type": "image/png",
        "aspect_ratio": "16:9",
        "image_size": "2K",
    },
)
需要知道的几点:
image_size接受1K、2K和4K。必须用大写K;2k这类小写值会被拒绝。- 2.1 没有 512px 档位,那是 Nano Banana 2 的。
- 支持的宽高比包括
1:1、2:3、3:2、3:4、4:3、4:5、5:4、9:16、16:9、21:9,以及极端比例1:4、4:1、1:8、8:1。16:9 在 2K 下是 2752x1536,在 4K 下是 5504x3072。 - 如果想要文本和图片同时返回,传列表:
response_format=[{"type": "text"}, {"type": "image"}]。
第 4 步:编辑已有图片
把图片作为 base64 image 块和文本指令一起发送:
with open("living_room.png", "rb") as f:
    image_b64 = base64.b64encode(f.read()).decode("utf-8")

interaction = client.interactions.create(
    model="gemini-nano-banana-2.1",
    input=[
        {"type": "text", "text": "Using the provided image of a living room, change only the blue sofa to be a vintage, brown leather chesterfield sofa. Keep the rest of the room, including the pillows on the sofa and the lighting, unchanged."},
        {"type": "image", "data": image_b64, "mime_type": "image/png"},
    ],
)
不用蒙版文件的蒙版式局部重绘
没有单独的蒙版上传,蒙版用文字来定义。Google 给的模板:
Using the provided image, change only the [specific element] to [new element/description]. Keep everything else in the image exactly the same, preserving the original style, lighting, and composition.
只点名一个要改的元素,具体描述替换成什么,再重复一遍哪些必须保持不变。像“把沙发弄好看点”这种模糊提示,等于邀请模型重画整个房间。
第 5 步:多轮编辑持续迭代
多轮编辑是 Google 推荐的改图方式。把上一次交互的 id 作为 previous_interaction_id 传入,只发要改的内容:
interaction_2 = client.interactions.create(
    model="gemini-nano-banana-2.1",
    input="Update this infographic to be in Spanish. Do not change any other elements of the image.",
    previous_interaction_id=interaction.id,
    response_format={"type": "image", "mime_type": "image/png", "aspect_ratio": "16:9", "image_size": "2K"},
)
走 REST 时,同样的字段放在请求体里:"previous_interaction_id": "<PREVIOUS_INTERACTION_ID>"。2.1 改进的多轮角色一致性正是在这里发挥作用:角色或产品应该在后多轮编辑中保持可辨识。
第 6 步:组合最多 14 张参考图
向 input 列表添加更多 image 块即可。对 2.1,Google 文档写明最多 10 张高保真物体图加最多 4 张角色图,共 14 张:
interaction = client.interactions.create(
    model="gemini-nano-banana-2.1",
    input=[
        {"type": "text", "text": "An office group photo of these people, they are making funny faces."},
        {"type": "image", "data": person_1_b64, "mime_type": "image/png"},
        {"type": "image", "data": person_2_b64, "mime_type": "image/png"},
        {"type": "image", "data": person_3_b64, "mime_type": "image/png"},
    ],
    response_format={"type": "image", "aspect_ratio": "5:4", "image_size": "2K"},
)
参考图按输入 token 计费,而 2.1 的输入价格是 Nano Banana 2 的三倍。重参考图的工作流会缩小价差,切换前先算笔账。
第 7 步:用 Google 搜索为图片落地事实
对于依赖当前事实的图片,比如天气图或近期事件的画面,加上搜索工具:
interaction = client.interactions.create(
    model="gemini-nano-banana-2.1",
    input="A detailed painting of a Timareta butterfly resting on a flower",
    tools=[{"type": "google_search", "search_types": ["web_search", "image_search"]}],
)
只用 {"type": "google_search"} 就是网页搜索;加上 image_search 后模型可以把网络图片用作视觉上下文,这是 2.1 和 Nano Banana 2 才支持的。搜索落地不能使用真实人物图片。如果把落地结果展示给用户,Google 要求你展示 google_search_result 步骤中返回的 search_suggestions。
第 8 步:在 Apifox 里测试
脚本适合做生成。要检查“某个提示词、某个 key、某个模型是否还正常”,保存好的请求更快。在 Apifox 中:
- 创建环境,添加变量
GEMINI_API_KEY,填入你的 key。 - 创建请求:
POST https://generativelanguage.googleapis.com/v1beta/interactions。 - 添加 header:
x-goog-api-key: {{GEMINI_API_KEY}}。 - 粘贴包含
model、input和response_format的 JSON body,点击发送。 - 添加后置脚本,写两条断言:
pm.test("status is 200", () => {
  pm.response.to.have.status(200);
});

pm.test("response contains an image block", () => {
  const steps = pm.response.json().steps || [];
  const hasImage = steps.some(s =>
    s.type === "model_output" &&
    (s.content || []).some(c => c.type === "image" && c.data)
  );
  pm.expect(hasImage).to.be.true;
});
- 复制该请求,把
model改成gemini-3.1-flash-image,用同样的提示词各发一次。
这样你就有了 2.1 对 Nano Banana 2 的并排检查,每次运行的状态码、耗时和响应大小一目了然。更全面的功能对比见《Nano Banana 2.1 vs Nano Banana 2 vs Pro》。
价格
付费档价格,来自 Google 价格页 2026 年 10 月 7 日的数据:
| 模型 | 输入 / 1M | 1K 图片 | 2K 图片 | 4K 图片 | Batch 1K |
|---|---|---|---|---|---|
| Nano Banana 2.1 | $1.50 | $0.0336 | $0.0504 | $0.0756 | $0.0168 |
| Nano Banana 2 | $0.50 | $0.067 | $0.101 | $0.151 | $0.034 |
| Nano Banana Pro | $2.00 | $0.134 | $0.134 | $0.24 | $0.067 |
2.1 的图片输出按每 1M token $30 计。1K 图片是 1120 token,2K 是 1680,4K 是 2520——每张图的价格就是这么算出来的。文本和思考输出为每 1M $7.50。搜索落地在 Gemini 3.x 系列模型间共享每月 5000 次免费额度,之后每 1000 次 $14。
算一笔账:用短文本提示词(每条约 100 输入 token)生成 1000 张 2K 产品图。
- 输出:1,000 x $0.0504 = $50.40
- 输入:100,000 token x $1.50 / 1M = $0.15
- 合计约 $50.55,外加思考文本的 token 费用
同样的活儿在 Nano Banana 2 上约 $101。走 Batch API 的话,2.1 的 2K 单价降到 $0.0252,输出部分降到 $25.20——前提是你等得起。Batch 任务用最长 24 小时的周转时间换更高的速率限制。Nano Banana 2 定价的更多细节见《Nano Banana 2 API 价格拆解》。
常见错误
下面是 Gemini API 的通用行为,不是文档里列出的 2.1 专属错误:
| 错误 | 可能原因 | 处理办法 |
|---|---|---|
400 INVALID_ARGUMENT |
image_size 用了小写、宽高比不支持、input 格式错误 |
用 2K 不要用 2k;核对比例列表 |
403 PERMISSION_DENIED |
key 无效,或项目未开通计费 | 检查 key 并开通计费 |
404 NOT_FOUND |
model ID 拼写错误 | 严格使用 gemini-nano-banana-2.1 |
429 RESOURCE_EXHAUSTED |
触发速率限制 | 退避重试,或改用 Batch |
500 / 503 |
服务端临时故障 | 指数退避重试 |
| 200 但没有图片 | 提示词被拦截,或只返回了文本 | 设置 "type": "image" 并改写提示词 |
常见问题
Nano Banana 2.1 API 有免费档吗?没有。Google 把 API 免费档列为 “Not available”。AI Studio playground 接入了 2.1,但 Google 没有公布它的免费额度。
2.1 能直接替换 Nano Banana 2 吗?基本可以。把 model ID 换成 gemini-nano-banana-2.1 即可。你会失去 512px 档位,输入 token 也更贵,重参考图的编辑需要先算成本。
生成的图带水印吗?带。所有输出都含 SynthID 水印。
能用视频生成图片吗?能。2.1 支持 video 输入块,比如 YouTube 链接,和文本提示词一起传。
旧的 Nano Banana 2 API 指南还有用吗?概念仍然适用。早期模型见我们的《Nano Banana 2 API 指南》。
小结
Nano Banana 2.1 承诺更好的图片、只要 Nano Banana 2 单图价格的一半,API 形状还是同一套 Interactions API。申请一个已开通计费的 key,生成一张图,然后把请求连同状态码和图片断言一起保存在 Apifox 里。再用旧 model ID 复制一份同样的请求,一个下午之内你就能知道 2.1 值不值得为你手上的提示词切换。
开发必备:API 全流程管理神器 Apifox
介绍完上文的内容,我想额外介绍一个对开发者同样重要的效率工具 —— Apifox。作为一个集 API 文档、调试、设计、测试、Mock、自动化测试于一体的工具,Apifox 是目前提升研发效率的首选。
如果你正在开发项目,不妨试试其极其友好的界面设计,它完全兼容 Postman 和 Swagger 数据格式,导入数据非常方便,,即使是新手也能很快上手,点击这里即可注册使用。
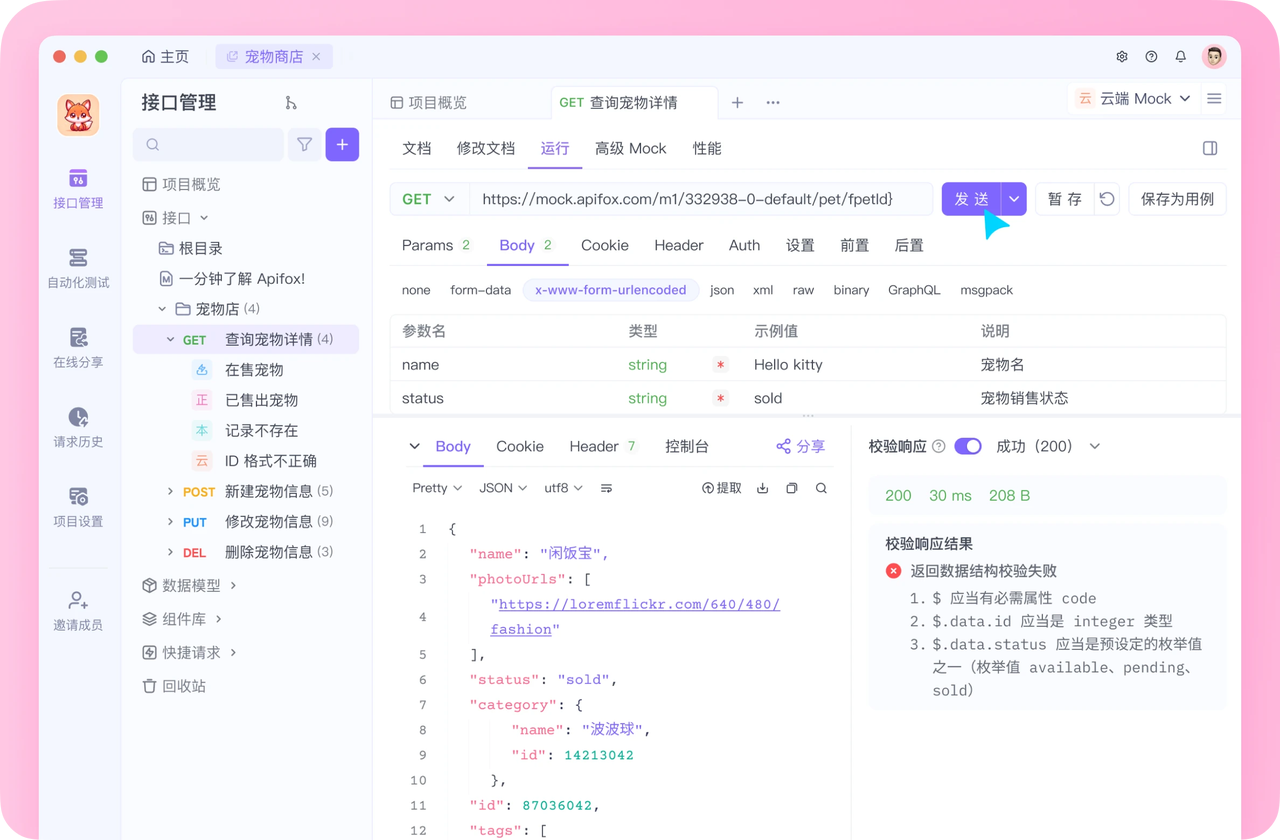
值得一提的是,除了个人和常规团队使用,针对有高安全合规要求、或需要在内网环境协作的企业,Apifox 还提供了深度定制的私有化部署方案。
获取专属报价与部署方案
 详细的私有化部署系统架构与安全白皮书
 针对您公司规模的专属报价单
 免费的 1v1 专属产品演示 (Demo) 机会